Preparation and planning for DIY upholstery
Assessing furniture and fabric options
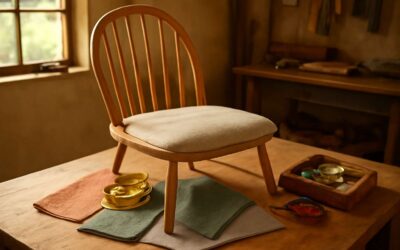
Sunlight spills across a South African workshop as a worn chair waits for its second life. A recent study finds that smart prep can reduce rework by a surprising margin. Preparation and planning set the stage for reupholster yourself, turning a fragile frame into a lasting, story-woven staple!
Consider these anchors for a careful start to your project:
- Frame stability and joints
- Cushioning and seat depth
- Fabric durability and climate suitability
- Budget, sourcing, and timelines
Assessing furniture and fabric options means weighing style against function, era against wear. In SA, durability, sun exposure, and local suppliers shape the final choice; the right fabric breathes and ages with the space, while the frame holds fast through seasons.
Measuring and budgeting for your project
Smart prep cuts rework by up to 40%, a truth SA workshops whisper after long measuring sessions. The first step is a quiet map I rely on: measure, estimate, and pace yourself. In our climate, sun and seasons test fabric and frame, so this phase anchors reality.
- Measure seat depth, back height, arm width, and leg clearance
- Estimate fabric yardage with a 10-15% waste margin
- Price foam, batting, tacks, and adhesives; add a cushion refresh plan
- Set a realistic budget window and a timeline with buffer
With a budget cleared and a measuring routine in place, you set the rhythm for success.
If you intend to reupholster yourself, anchor the project with exact measurements, a realistic budget, and a timeline that accommodates trims, foam, and fabric delivery.
Safety considerations and workspace setup
“Clear space, clear head” is the creed I use to kick off any project. A well-lit, uncluttered bench trims miscuts and keeps you smiling through glue fumes and fabric swatches. Preparation for DIY upholstery isn’t glamorous, but it pays in calmer afternoons and fewer snafus on the cutting mat.
Safety comes first: seal off the spill-prone area, wear eye protection, and ventilate when you’re sanding foam or using adhesives. Keep blades sharp but sheathed, and store solvents away from heat. A dedicated, clutter-free workspace reduces accidents and speeds the process.
- Protective gear: safety glasses, a mask, and gloves
- Ventilation: work in a airy area or with a fan when using solvents
- Tool safety: blades retracted, clamps within reach, scraps tidied
Workspace setup matters more than you’d think. A sturdy worktable, ample lighting, a cutting mat, and a drop cloth keep fabric clean and corners square. Have a power strip handy—SA homes often trip a circuit—plus a labeled bin for trim and waste—less rummaging, more sewing.
If you reupholster yourself, plan for space, time, and a buffer for those stubborn cushions—you’ll thank the calendar when the final seam lands perfectly.
Common mistakes to avoid in DIY upholstery
In South Africa, a well-planned upholstery project shortens the path from idea to finished piece. Preparation and planning turn rough sketches into a workable pattern, preventing curve-busting surprises at the seam. For readers who reupholster yourself, calm planning matters as much as any stitch.
Begin with a simple mock-up: map seams, check grain, and test a fabric scrap before cutting into the real cover. A realistic cushion plan—closures, piping, and foam containment—saves time on the sewing mat.
- Align patterns on curves
- Plan fabric waste and layout
- Dry-fit the cover before assembly
- Ensure hardware and closures match
With this approach, buffers keep momentum and the final seat sits true—and the project ends with confidence rather than frayed nerves!
Choosing the right fabric for durability and style
“Preparation is the seam where dreams become furniture,” a mentor once told me. In South Africa, a well-planned fabric choice for durability and style shortens the journey from napkin sketch to finished piece. When you reupholster yourself, starting with intent makes every stitch calmer and more lasting.
A gentle mock-up often reveals where seams will meet grain and how a scrap informs the final cut. A cushion plan—closures and containment—saves time on the sewing mat. Consider how pattern pieces will lie on curves to reduce misalignment.
- Mock-up considerations
- Grain and curve alignment
- Layout efficiency to reduce waste
In this preparation phase, the fabric’s wear under sun and use deserves quiet thought. This discipline lets you reupholster yourself with pride, knowing the process respects both craft and home.
Tools and materials you’ll need
Staple guns and alternatives
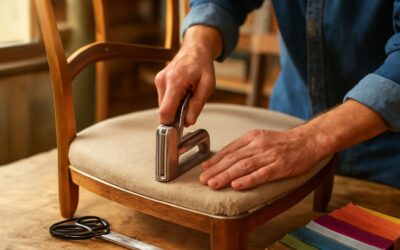
Make it last—’If it ain’t broke, don’t throw it away.’ That attitude fuels the reupholster yourself trend across South Africa, where a single chair can gain years of use with careful work! For this section, focus on the tools and materials that set your project up for success.
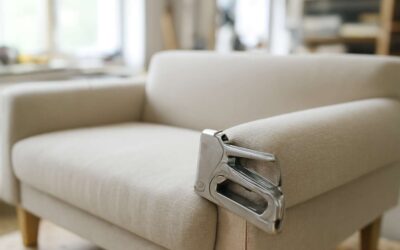
Key tools and materials ensure clean lines and durable results. Staple guns and alternatives keep the fabric anchored, while a good pair of scissors and needles handle delicate corners.
- Staple gun (manual or pneumatic) with a supply of staples
- Upholstery fabric scissors and a sharp utility knife
- Foam, batting, or webbing to rebuild cushions
- Upholstery needle, heavy-duty thread, and a curved needle for tight spots
- Upholsterer’s hammer, pliers, and a fabric roller for smooth finishing
These essentials form the backbone of a solid, repeatable process.
Cutting and measuring tools
Tools can make or mar your reupholster yourself journey. In South Africa’s thriving DIY scene, the right kit turns a sagging chair into a showroom-ready treasure. The staple gun becomes your anchor, and cutting and measuring tools keep seams precise. A sharp pair of upholstery fabric scissors and a sharp utility knife help you cleanly trim corners, while foam, batting, or webbing rebuilds cushions for lasting comfort.
These are the essentials that form the backbone of a solid, repeatable process:
- Staple gun (manual or pneumatic) with a supply of staples
- Upholstery fabric scissors and a sharp utility knife
- Foam, batting, or webbing to rebuild cushions
- Upholstery needle, heavy-duty thread, and a curved needle for tight spots
- Upholsterer’s hammer, pliers, and a fabric roller for smooth finishing
Fabrics, foam, and padding options
South African homes refresh furniture faster than new buys—nearly 6 in 10 updates start by reupholstering, not replacing. Reupholster yourself and breathe new life into a tired chair or sofa, keeping character while trimming costs.
Fabrics, foam, and padding options form the backbone of a lasting transformation. Choose fabrics with durability and appeal that suit your room, then balance comfort and shape with foam densities and layered padding. The right mix protects seams and seats for years to come, even in high-traffic spaces.
- Fabrics: performance blends, genuine leather alternatives, and heavy-duty upholstery textiles
- Foam and padding: high-density foam, layered batting, and occasional memory foam for comfort
- Support options: webbing, serpentine springs, or reinforced frame padding
With these materials at hand, the reupholster yourself project can glide from concept to finish with confidence.
Fasteners, nails, and upholstery tacks
Nearly 6 in 10 updates in South African homes start with reupholstering rather than replacing. If you’re drawn to reviving a chair’s character, reupholster yourself and watch a room shift—as if a memory you can hold in your hands.
Tools and materials you’ll need center on fasteners, nails, and upholstery tacks. They anchor the fabric with quiet authority, resisting the pull of daily use. I keep a compact kit so every decision is deliberate.
- Upholstery nails and decorative tacks for clean, lasting edges
- Upholstery staples or glue as appropriate for your fabric choice
- Tack hammer or fine hammer for precise placement
Choosing to repair becomes a meditation on value, form, and the courage to mend. The right hardware can turn a tired piece into a testament to craft and care.
Protective gear and safety equipment
Nearly six in ten updates in South African homes start with reupholster yourself, a move that lets a tired chair live again and quietly transform a room’s mood.
Your toolkit should be compact but capable; I keep mine ready so every decision is deliberate. For the core load, choose sturdy fasteners, nails, and upholstery tacks that anchor fabric with quiet gravity.
Protective gear and safety equipment keep the process clean and controlled. In the kit, add:
- Leather gloves
- Safety glasses or goggles
- Dust mask or respirator
- Hearing protection
- Apron or shop coat
With the right gear, the act of renewal becomes a steady ritual—craft, care, and the memory of the original design blending into the present.
Storage and organization tips
Nearly six in ten updates in South African homes start with reupholster yourself. A tidy, purpose-built workspace is the quiet engine behind every successful project. A compact toolkit, a handful of sturdy fasteners, and a mindset tuned to precision keep decisions deliberate. In South Africa, space is premium—every inch earned through smart storage and intention.
Storage fundamentals include:
- Clear plastic bins for fabric scraps
- Stackable trays for fasteners and trims
- Label maker or permanent markers for labeling
- Wall-mounted shelves or pegboard for tools
A rolling cart, vertical shelving, and labeled bins form a workflow that respects both craft and conscience. This approach makes it easier to reupholster yourself with calm focus rather than rushed improvisation. Respect for materials becomes a daily ritual.
Step-by-step DIY upholstery process
Remove old fabric and inspect frame and springs
Take a breath and begin with a brave act of discovery: remove the old fabric without mercy and inspect the frame and springs. For a South African workshop, this moment is diagnostic and delicate. If you want to reupholster yourself, you must treat the chair’s skeleton with respect.
Here are the immediate observations to guide the dialogue between fabric and form:
- Observe how the fabric was attached along the edges and where the pattern aligns.
- Record seam lines or motifs to guide future covering.
- Inspect the frame and springs for signs of wear, sag, rust, or loose joints.
With these observations in hand, the next phase unfolds as a measured duet of style and substance, where padding, fabric mood, and silhouette converge. In South African homes, patience and a keen eye for detail turn a simple chair into a refined conversation piece.
Replacing padding and foam
Replacing spring support or webbing
Across South Africa, 78% of homeowners would rather rework a beloved chair than buy new. That stubborn devotion to craft keeps pieces from the scrap heap and tells a story of homegrown resilience. If you’re ready to reupholster yourself, here’s a steady path.
Step-by-step, start with the spring support or webbing, and move through with calm hands:
- Assess the spring system: coil springs or webbing, and decide if replacement is needed.
- Remove old supports and install new, ensuring even spacing and proper tension.
- Secure with fresh anchors and check alignment before finishing the fabric.
With patience, a tidy workshop, and the right materials, you can breathe new life into an old chair—watching it carry decades of family meals and memories, much like a dawn over the veld. You’ll be inspired to reupholster yourself again for the next project.
Cutting and attaching new fabric with method
Cutting with care is the hinge of transformation; your chair becomes a living thing as fabric yields to your hands. To reupholster yourself, every snip is a promise to longevity, every seam a whispered oath to the past.
Cutting and attaching the fabric, in a sunlit South African studio, when done with method, creates a canvas that holds memories and shape. Align the grain, pin, and pull taut as you proceed.
- Lay the fabric face down; align pattern; cut with generous seam allowances.
- Center over the seat, staple from the middle outward; smooth as you go.
- Wrap corners neatly, trim excess, and check tension before final finish.
With patient hands and a quiet workshop, you breathe new life into the chair, ready for decades more around the table.
Finishing corners and hems
A single neatly finished corner can add decades to a chair’s life. In a sunlit South African studio, that truth sits at the heart of every reupholster yourself project.
When finishing corners and hems, balance is the craft. You ease the fabric around the arm and seat, fold with precision, and let the edge kiss the edge so the cover settles rather than puckers. The final tension should be even, the hem parallel to the floor, the seam tucked cleanly out of sight.
This is where memory meets method: a quiet conversation between fabric and frame, where patience outlasts haste and the chair returns to the table with renewed presence.
Common sewing tips and troubleshooting
Chairs in a sunlit Cape Town studio prove that patience outlasts price. Across South Africa, up to 40% of a furniture project’s value rests in the fabric and the hands that coax it. To reupholster yourself with care is to reclaim a memory as much as a seat.
Step-by-step, the work becomes a meditation on balance. Pattern and cut with generous margins, pin and sew edges true, fit over the frame and adjust tension, then trim and reseat for a graceful, puckering-free finish.
- Pattern and cut with generous margins
- Pin and sew edges true
- Fit over the frame and test tension
- Trim and reseat for a smooth finish
Common sewing tips and troubleshooting:
- Test stitch tension on scrap fabric and keep a steady pace.
- Choose the right needle and thread for your fabric to avoid skipped stitches.
- Let the fabric ease around curves; force only dulls the line.
That’s how you reupholster yourself with presence.
Finishing touches and maintenance
Sealing edges and securing corners
Finishing touches aren’t optional flair—they’re the difference between “looks okay” and “locks in style.” After you’ve replaced padding, attached fabric, and checked the frame, the last pass should calm the fabric into crisp edges and taut corners. If you reupholster yourself, those small decisions—thread color, stitch type, and how you secure the hem—add up to professional results without needing a professional budget in South Africa.
Sealing edges and securing corners isn’t just cosmetic; it preserves form and lengthens the life of the piece. A tidy edge and well-defined corner give the upholstery its silhouette, reduce future wear, and heighten the overall impression. If you want quick reassurance, consider these cues:
- Durable edges that resist fraying
- Polished corners that maintain shape
- Clean, unobtrusive stitching and trimming
Cleaning, conditioning, and fabric care
Finish isn’t garnish; it’s the quiet covenant between fabric and frame. When corners stay crisp and seams sit clean, the piece earns a room’s respect without shouting. The eye notices restraint, the hand feels a chair that has weathered life and still returns to shape. That’s the power of a thoughtful finish in a South African setting—reupholster yourself with intention and let your care show.
- Regular vacuuming with a soft brush to lift dust
- Spot clean promptly with mild, fabric-approved cleaners
- Avoid direct sunlight and heat to preserve color and fiber
Maintenance follows from intent: cleaning, conditioning, and fabric care should align with the fabric’s needs and the piece’s role in the home. If you reupholster yourself, you shape the care philosophy from the outset, choosing cleaners and protectors that respect tone, texture, and longevity in a climate of heat and sun. Regular attention keeps silhouette and color speaking through the years.
How to reupholster cushions vs. furniture bodies
In the heart of a sunlit South African lounge, a finished chair speaks before a guest sits. If you reupholster yourself with patience and care, you honor the piece’s history and the home it inhabits. Finishing touches aren’t garnish; they’re the quiet handshake between fabric and frame, guiding wear through the heat of a Southern summer and the weight of daily life.
- Cushions: crisp edges with piping and removable covers
- Furniture bodies: uninterrupted surfaces that recall the grain
The difference is in scale and tension, not in purpose.
Keep up regular gentle care—brush, blot, and admire how the fabric settles back into its new life.
Long-term maintenance and stain resistance
Finishing touches aren’t garnish; they’re the quiet handshake between fabric and frame. In a sunlit South African lounge, that handshake is what a guest notices first. If you reupholster yourself with patience, you honour the piece’s history and the home it inhabits. Finishing touches—tight edges, neat hems, and secure piping—frame the story the chair is quietly telling.
Long-term maintenance and stain resistance hinge on respect for the fabric’s life. Choose materials that breathe and age gracefully; the sun’s relentless light and daily use leave their marks, but with thoughtful care the fabric can settle back toward its new life rather than falter.
- Sun exposure and color drift over time
- Stain resistance and fabric protection as part of the finish
- Professional cleaning cycles to sustain appearance
Troubleshooting wear and tear and when to seek professional help
The South African sun doesn’t simply warm a room; it tests every thread, rewriting fabric’s memory. Finishing touches are more than cosmetics; they are the quiet handshake between fabric and frame.
Finishing touches—tight edges, neat hems, secure piping—frame the story the chair tells. If you reupholster yourself, you honour the piece’s history and your home’s character, choosing breathable materials that age with grace.
- Color drift under sun; use UV-stable fabrics or shield the piece.
- Seams and piping should stay taut; slack stitches invite wear.
- Cushions that lose shape? Seek a pro.
When to seek professional help becomes clear: serious frame movement, broken springs, or tears beyond patching deserve an expert touch.

0 Comments