Assessing Your Porsche 944 Seats
Identify Seat Wear and Damage Patterns
There is a moment of reckoning for every Porsche 944 owner, usually occurring when you slide into the driver’s seat and feel the unmistakable crackle of sun-baked vinyl beneath you. In South Africa, the harsh UV rays are less of a gentle kiss and more of a relentless assault on your interior. The first step in any meaningful restoration is a forensic examination of the damage, distinguishing between cosmetic annoyances and structural neglect.
The material on these seats often fails in specific patterns. You will likely find the outer bolster, the one that takes the brunt of your daily ingress, has collapsed into a sad, wrinkled shadow of its former self. The foam beneath has given up its structural integrity, turning to dust that now coats the underside of your trousers. Look for the telltale signs of stitching failure along the stress points. Once the thread snaps, the cover begins to gape, accelerating the wear on the underlying fabric.
To truly understand the scope of your project, take a moment to listen to what the seat is telling you. A simple inspection checklist for the damage patterns includes:
1. The base cushion side pipe, which often wears through to the white backing material.
2. The seat back hinge area, where friction creates deep, abrasive grooves.
3. The headrest posts, which tend to crack the vinyl at their base due to constant adjustment.
Your assessment must also account for the foam’s resilience. Press firmly into the center of the base cushion. If it does not spring back quickly, or if you feel the hard frame beneath, the support structure is compromised. This is a critical finding that will influence your budget. It informs whether you simply reupholster porsche 944 seats with new skins or whether you need to invest in new foam buns to replace the desiccated originals. Ignoring the padding failure will only result in a fresh cover that sags within months. In this climate, the dust and grit from the Highveld winds also act as an abrasive agent, embedding themselves in the fibers and eating away at the stitching from the inside out.
Deciding Between Repair and Full Replacement
Once the damage is mapped, the true question surfaces: do you repair what remains or replace what has perished? In my workshop, I have seen seats where the outer skin held its shape, but the foam beneath had turned to dust. In those cases, to reupholster porsche 944 seats with fresh covers over the old structure would be a futile gesture.
The decision rests on the frame and the padding. A base that sags under a thumb is beyond saving. Three measurements will settle the argument:
- Foam resilience at the bolsters.
- Frame integrity at the hinge points.
- Cover adhesion to the backing material.
If any one of these fails, full replacement is the only honest choice.
Tools and Materials Needed for Removal
Before any socket touches the bolts, the seat demands a final appraisal. I run my palm along the lower rail, searching for corrosion that locks the sliders into place. A seized mechanism turns extraction into a lengthy struggle, and coastal humidity brings that rust quickly. The hinge covers often hide stripped screws, so I probe those recesses with a torch before committing.
- Flat trim removal tools
- Long extension bar
- Penetrating oil
With the assessment complete, gather those essentials plus a 10mm and 13mm socket and a Torx T30 for the belt anchor. The electrical harness for the lumbar motor requires a gentle disconnect, and the plastic clips perish from age. Handle those connectors with care! Once the seat is free, you see why the factory bolted it down with such intent. To reupholster porsche 944 seats properly, every stage of removal respects that geometry.
Preparing the Workspace
Before you reupholster porsche 944 seats, the workspace itself demands respect. A garage floor streaked with old oil will sabotage your patience. I prefer a clean concrete slab, swept twice, with a heavy tarp laid beneath the rails. That tarp catches the brittle foam crumbs and stray hog rings that always escape during extraction.
Position a work lamp at a low angle rather than directly overhead. Shadows hide the precise seam positions you need to mark for reference. Coastal humidity in South African garages dulls contact adhesive quickly, so run a dehumidifier for a few hours before starting.
- Clear a two metre radius around the workbench
- Label separate containers for each seat bolt
- Allow the adhesive and vinyl to acclimatise overnight
When the space is orderly, the seat removal becomes a measured sequence rather than a struggle. The car waits, and the upholstery work begins with that calm.
Selecting Fabric and Leather Options
Original OEM vs Aftermarket Kits
The price of a pristine original Porsche 944 sport seat can exceed the value of a decent daily driver, which makes the decision of covering material surprisingly weighty. When you decide to reupholster Porsche 944 seats, the first fork in the road is the tactile world of fabric versus the classic prestige of leather. Original cloth, often a tartan or basketweave pattern, offers remarkable grip and breathability, a boon for the summer heat that builds up in a glassy cabin. It also tends to be more forgiving on the hip bolsters during entry and exit.
Leather, on the other hand, transforms the cabin’s ambiance with a refined, upscale atmosphere that feels wonderfully crisp against the skin on a cool Highveld morning. The hide does demand more vigilance with conditioner, but the payoff is a timeless appearance that many owners crave.
– Durability: High-grade leather resists tearing but can crack if neglected. Modern synthetic fabrics often outlast the originals.
– Grip: Cloth holds you in place during spirited driving; leather is slicker.
– Cost: Quality hides are typically pricier than premium woven materials.
Once you settle on the material, the sourcing strategy becomes the next quest. You can purchase an OEM reproduction kit, which uses the factory patterns and sometimes the original tooling. These kits offer a perfect fit and an authentic appearance, but the color and texture options are limited. Aftermarket kits from specialist trim shops provide a broader palette and allow for custom piping or perforation details. These require a skilled installer to achieve that taut, factory-like finish, whereas the OEM pieces often install with less fuss. Weigh the value of convenience against the desire for personal flair. Ultimately, the correct choice hinges on whether you see this interior as a preservation project or a canvas for your own motoring tastes. The path you select here will define the entire character of your restoration.
Leather Quality Grades and Durability
When you reupholster Porsche 944 seats, leather grading matters. Full-grain hides retain their natural surface, developing a quiet patina over years. Top-grain, sanded smooth, offers a more uniform finish but loses some resilience. Split leather, often found in economy kits, lacks the fiber density for long-term performance.
- Full-grain: strongest, develops character
- Top-grain: softer, more consistent
- Split: affordable, wears faster
In my experience, cloth alternatives present a different trade. Dense basketweave grips without sticking to bare legs on warm Joburg afternoons. Synthetic blends resist fading better than original wool, though they lack the factory texture. The final choice defines the cabin’s personality.
Synthetic Alternatives and Vinyl Considerations
The upholstery market in South Africa offers more choices than most owners expect. When you reupholster Porsche 944 seats, the material decision shapes every drive. Vinyl has transformed in recent years. Modern compounds resist heat and UV exposure far better than the stiff, brittle sheets of the past. Some vinyls now mimic leather grain with surprising accuracy, and they handle Johannesburg summers without cracking.
Synthetic suede provides a different character. It grips during cornering and feels closer to factory sport seats. The tradeoff is maintenance, as it collects dust and requires dedicated cleaners.
Here is what I weigh when helping friends choose:
– Vinyl suits daily drivers and parking under open skies
– Synthetic suede rewards careful owners who garage their cars
– Technical fabrics breathe better in coastal humidity
The right choice depends entirely on how the car lives its life.
Comfort and Climate Factors
Cape Town’s coastal air holds salt and moisture that can leave even quality hides feeling tacky. When you reupholster Porsche 944 seats for a car parked near the ocean, the fabric’s breathability becomes more important than its sheen. A tightly woven cloth lets heat escape during traffic on the N1, while full leather traps warmth against your back.
The choice often splits along provincial lines. Gauteng owners deal with dry heat and intense UV, which makes perforated leather a sensible pick. Durban drivers face humidity that dulls synthetic materials, so a natural fibre blend might serve better. The grip of the seat surface matters too. Cloth holds you in place through corners, whereas leather slides you around.
Consider these material traits before committing:
– Full grain leather ages gracefully but needs regular conditioning
– Breathable mesh fabrics dry quickly after sudden downpours
– Perforated hides offer airflow without sacrificing the premium look
The interior temperature of a 944 changes quickly under the African sun. Dark materials absorb heat fast, so lighter tones can reduce discomfort during summer drives. The final decision should reflect where you park, how you drive, and what feels right against your skin.
Removal and Disassembly of Seat Covers
Removing the Seat from the Chassis
Extracting the seats from a Porsche 944 is straightforward, though your knuckles might disagree. Before you reupholster porsche 944 seats, the entire chair must leave the chassis. Slide the rails forward, then locate four 13mm bolts beneath plastic covers. A swivel socket extension saves your hands. Once free, carry the seat to a clean bench. The cover attaches with hog rings and clips. Your disassembly order:
- Pry off the trim caps on the side bolsters.
- Release the hog rings using pliers.
- Peel the cover from the foam, noting the seam placement.
Work slowly to avoid tearing the foam. The lumbar support cable often snags, so free it with a flathead screwdriver.
Detaching Foam Cushions and Panels
Once the cover is free, the foam cushions reveal their own quirks. The backrest foam slides off after you release the plastic clips along the frame. Side bolster foam often needs a gentle twist to separate from the metal pan. Do not force it. The seat back panel, that rigid plastic shell, has hidden screws behind the lower edge.
Detaching the panels follows a clear sequence:
- Remove the plastic adjuster knobs on the side.
- Unclip the lumbar support bladder.
- Lift the foam base from the locating pins.
The frame then sits bare, ready for new foam or repairs. When you reupholster porsche 944 seats, this stage determines how cleanly the new covers sit on the finished chair.
Handling Bolsters and Reclining Mechanisms
Most owners underestimate the complexity of removing the original cover from the frame. The vinyl and leather layers are secured with hog rings, not simple clips. You must lift these rings with a specialized tool, working methodically along the lower edge. Pulling the fabric hard risks tearing the perforated leather at the seam.
The side bolsters present a separate challenge. Their dense foam is shaped to hold the body during cornering, which means the cover wraps tightly around compound curves. Work your fingers underneath the fabric to break the adhesive bond that holds the bolster foam to the frame. Once released, the bolster cover slides off with a firm tug.
The reclining mechanism on the 944 uses a lever that connects to a cable. This cable runs inside a plastic conduit along the seat track. Releasing the cover from this area requires patience, as the trim edges tuck behind metal brackets. The sequence for separating the layers:
1. Unscrew the side trim cap.
2. Pull the leather edge from the plastic guide rail.
3. Detach the cable housing from its retaining clip.
A clean removal sets the foundation for the entire project. Every crease and stress point in the old fabric reveals its own story, and reading those signs now prevents problems during installation. When you reupholster porsche 944 seats, this careful approach to disassembly protects the delicate foam underneath, which keeps the new leather firm and supportive for years.
Taking Apart Old Upholstery for Patterns
When you reupholster porsche 944 seats, the old cover is not just trash. It is your blueprint. Many DIYers slice the fabric off with a knife, and that is a tragedy. The original stitching lines, seam allowances, and dart placements are all encoded in that dusty shell. Preserve it like a museum artifact.
Lay the removed cover flat on a clean bench. Do not stretch it. Measure the seam-to-seam distances and note where the foam thickness changes. The 944 seat base has a distinct shape where the thigh support flares out. That curve is difficult to replicate without the old pieces.
A methodical approach pays off:
1. Mark each panel with chalk on the underside before separating any seams.
2. Photograph the assembly from multiple angles for reference.
3. Remove the hog rings with pliers, not brute force.
The original cover also reveals the exact placement of the perforated leather sections. When you reupholster porsche 944 seats, matching these panels ensures proper airflow and a factory appearance.
Inspecting and Reconditioning Foam
The moment you peel back the old cover, the foam tells the truth! I work from the rear edge forward, easing the cover off without tugging. Original hog rings may fight back, but aviation snips handle them quickly.
Once the cover is off, inspect every contour. When you reupholster porsche 944 seats, the cushion often has collapsed side bolsters. Run your hand across the surface. Signs to look for:
– Deep pressure lines that stay compressed
– Visible cracking or powdering
– Areas where the foam crumbles on touch
When you reupholster porsche 944 seats, dense, closed-cell foam can be reconditioned, but crumbled pieces need replacement. To recondition usable foam, clean off old adhesive with a stiff brush. Apply fresh contact cement where the memory foam meets the base layer. The foam must provide even support. Level any low spots before the new cover goes on.
Replacing Seat Heaters and Wiring
The plastic retainers behind the seatback release with a flat screwdriver, but patience matters more than force. When you reupholster porsche 944 seats, the cover comes off in layers. Start at the front edge, then ease the side panels away. Do not yank the fabric. The foam and cover often share the same clips, so work each one individually.
Once the cover is free, you will see the seat heater element glued to the foam. That element is fragile. If it cracks, it can short out. When you reupholster porsche 944 seats, replacing those heaters is simple if you follow a clear sequence:
1. Disconnect the wiring harness from the seat frame.
2. Peel the old element off without cutting into the foam.
3. Press the new heater onto the same surface.
Run the wires through the existing channels. Secure them with cable ties so they do not pinch under the reclining mechanism. Old wiring often has brittle insulation. Check every connector before reassembly. The foam must stay clean, and the new cover will slide over a smooth base.
Reupholstering Process Step by Step
Positioning and Stretching New Material
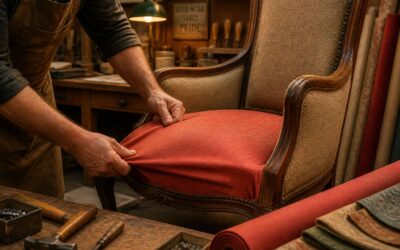
Positioning takes patience and a steady hand. When you reupholster Porsche 944 seats, the cover must settle onto the foam before any tension is applied. Begin at the centre of the base cushion and push outward with open palms, letting the material find its natural alignment with the moulded contours.
Leather yields to warmth. A low heat gun across the bolsters softens the hide enough to wrap the curved edges without creasing. Check the seam placement against the foam channels as you go. Misalignment at this stage becomes permanent once the hog rings are closed.
- Work in small sections, never pulling the full width at once
- Recheck the pattern position after every third hog ring
- Allow the material to rest for several minutes before final tensioning
The stretch itself should be incremental. When you reupholster Porsche 944 seats, even tension across each panel prevents distortion, and the cover should sit taut against the foam without straining the seams.
Securing Hog Rings and Fasteners
Hog rings are small, stubborn, and vital. When you reupholster Porsche 944 seats, these little metal loops turn a carefully draped cover into a finished seat. A quality pair of hog ring pliers changes the entire experience. The cheap ones will have you cursing within minutes.
Work from the centre outward. Each ring must grab the cover’s reinforcing strip, not just the fabric edge. A firm squeeze closes the loop, and then you check the alignment before moving on. Cut a ring off and try again if needed. Leather does not forgive a second clamp in the same spot.
- Rust resistant rings survive coastal humidity far longer.
- A flat screwdriver pries open stubborn rings without damage.
- Gloves stay optional until the first sharp edge reminds you.
The practical rhythm demands patience. Stop every third ring and inspect the seams before the tension builds.
Rebuilding the Seat Bolsters and Padding
A collapsed side bolster mocks a fresh cover. The eye notices the dip before the leather. Rebuilding starts with an honest assessment of the existing foam. Some cushions need only a layer of dense batting. Others require complete bolster replacement.
When I reupholster Porsche 944 seats, I shape new foam with a serrated knife and check the fit twice. The cover determines whether the foam suits the seat. If the cover wrinkles over a lump, the foam is wrong. Trim, test, trim again.
A few materials earn their place:
- High density foam sheets for bolster reconstruction
- Contact adhesive rated for upholstery work
- A sharp electric carving knife for clean cuts
The padding fills the cover without straining the seams. A firm bolster holds the driver through a corner. That is the point.
Reinstalling Covers and Smoothing Wrinkles
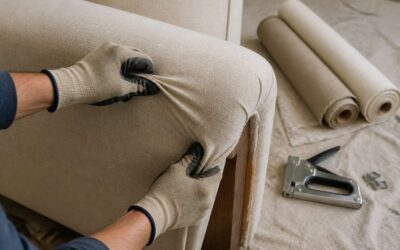
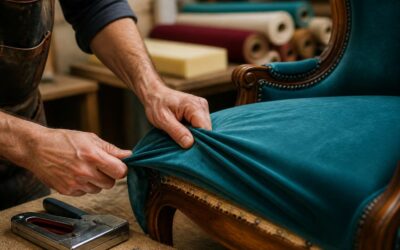
When the moment arrives to reupholster Porsche 944 seats, the cover slides over the rebuilt foam. The first pull reveals every flaw in the underlying work. A wrinkle here, a crease there. The material needs coaxing, not force.
I work from the centre outward. Each hand pulls gently, each hog ring secures the gain. Some wrinkles vanish immediately. Others resist. Stubborn folds often mean the foam beneath needs a small adjustment.
- Fit the cover over the top edge and check the seam alignment
- Pull the material down over the base, watching for creases
- Work the wrinkles outward toward the nearest anchor point
Warmth helps. A heat gun set low softens the backing and lets the cover conform. The finish rewards the patience. Smooth panels, crisp seams, nothing pulling against the stitching.
Reattaching Hardware and Trims
With the cover settled and the wrinkles banished, the metal returns. Reattaching hardware and trims completes the ceremony. Plastic side caps click back into place, their tabs finding the slots with a quiet click. The reclining lever receives its chrome handle.
Trim pieces hold their history. A warped panel betrays the entire rebuild. I have watched one faulty clip undo hours of careful work. Check each piece before fitting. Sand rough edges. Polish worn surfaces.
The sequence matters:
- Fit the plastic side trims and secure the retaining clips.
- Mount the reclining handles and adjuster knobs.
- Reattach the seat rail covers.
- Slide the seat into the chassis and torque the bolts.
When you reupholster Porsche 944 seats, this final act decides whether the work reads as factory or amateur. The hardware must sit true. Every clip carries the weight of the upholstery beneath it.
Post-Reupholstery Care and Maintenance
Cleaning Leather and Fabric Properly
A freshly upholstered interior can lose its luster within months if cleaning habits are inconsistent. When you reupholster Porsche 944 seats, the new material demands a deliberate routine that differs from the factory vinyl. Leather needs gentle pH balanced cleaners, while fabric requires low moisture extraction to prevent adhesive breakdown. Both benefit from immediate blotting rather than rubbing.
Your maintenance rhythm should follow a simple sequence:
- Vacuum crevices weekly to remove abrasive grit
- Test any cleaner on a hidden panel before use
- Condition leather every three months, never more often
- Keep fabric protected with a spray repellent
Sun exposure in South African climates accelerates fading. Park with window shades or tinted glass. The same care applies whether you chose full grain hides or premium textiles. Consistent attention preserves the workmanship you invested in.
Conditioning to Prevent Cracking
Your newly covered seats may look invincible, but the Highveld sun has other ideas. If you reupholster porsche 944 seats, understand that conditioning is the only thing between supple leather and cracked ghastliness. Cracking happens when natural oils evaporate, not merely from age. South African UV accelerates that loss, so you need to replenish moisture deliberately. Use a conditioner with natural fats, avoid silicone based protectants. Apply it thinly after a dust wipe, then let it sit overnight. Overconditioning turns the hide into a marshmallow, which leads to sagging and weak stitching. Many owners who reupholster porsche 944 seats neglect this step and pay for it later. A simple rhythm works:
- Condition every three months, never more often.
- Wipe dust with a dry microfibre cloth first.
- Allow the conditioner to fully absorb before seating.
For fabric seats, skip the oils and use a hydrophobic spray instead. The goal is to prevent cracking before it starts, not to cosmetically mask it.
Protecting Against Fading and UV Damage
After the effort to reupholster porsche 944 seats, the South African sun becomes the primary concern. Fading is gradual, yet relentless. UV rays degrade the dye in the hide and weaken the stitching thread long before the material cracks. The seats receive direct glare through the side windows during afternoon drives, which accelerates the damage.
The protective approach involves several practical elements:
- Window tint with UV filtering on the side glass.
- Reflective sun shades for the windshield when parked.
- Periodic application of UV blockers designed for automotive interiors.
Those who reupholster porsche 944 seats with leather should select products that contain UV absorbers, not generic interior dressings. Fabric surfaces need a different formulation, but the principle remains consistent. Inspection of the seams is equally important, since thread failure appears before surface damage. Catching that early warning prevents a full redo.
Routine Inspection of Seams and Fasteners
Once you reupholster porsche 944 seats, the real job starts. Seams and fasteners demand a weekly once over, especially after a month of Gauteng potholes. Run a finger along every stitch line. A loose thread here or a shifted hog ring there rarely announces itself loudly. I have seen covers that looked pristine while the fastener underneath had already let go.
- Check the seam where the bolster meets the base panel.
- Press each fastener to confirm it still bites into the frame.
- Look for puckering near the recliner mechanism.
That last spot collects abuse from entry and exit. Fasteners on the seatback hinge work loose without visible warning. Catching them early saves a second visit to the trimmer, and trust me, that bill stings! The upholstery holds up fine, but only if the skeleton beneath it stays honest. Owners who reupholster porsche 944 seats and then skip these checks will learn the lesson the expensive way.

0 Comments