Understanding Upholstery Basics
Types of Upholstery Fabrics
A single armchair can consume eight metres of fabric, yet most South African homeowners choose their upholstery based on colour alone. The weave, the substrate, and the abrasion resistance determine whether a sofa survives five years or twenty. Understanding these structural realities matters before any upholstery and reupholstery project begins.
Natural fibres like linen and cotton breathe well but crease under pressure. Synthetic options, including polyester and olefin, resist stains and fading under intense African sunlight. Leather, technically a hide, ages distinctly and requires different handling techniques.
- Fibre content dictates durability and cleanability
- Weave density affects snagging and long-term wear
- Backing and coating influence breathability and stretch
Formal lounges with occasional use tolerate delicate velvets. Family dens demand tighter weaves and higher rub counts, a distinction that becomes critical during upholstery and reupholstery. Fabric selection is ultimately a calculation between lifestyle and material science.
Frame Construction and Materials
The average sofa endures roughly two million sits before it retires. In my workshop, the frame determines whether those sits end at year five or year twenty. Kiln-dried hardwood frames, typically saligna or white ash, resist warping through Johannesburg summers and Cape Town winters. Softwood frames, often pine, flex and crack under repeated stress.
Joints matter as much as timber. Mortise and tenon joints reinforced with corner blocks hold firm across decades, while stapled and glued joints fail quietly. Suspension systems, whether serpentine springs or webbing, shape the seat’s feel and the padding’s lifespan.
1. Hardwood frames justify costly upholstery and reupholstery work.
2. Softwood frames rarely survive a second recovery.
3. Screwed corner blocks outlast stapled ones.
A sound frame turns upholstery and reupholstery into a genuine investment. A failing frame wastes the same effort entirely.
Cushion Filling Options
Run your hand across a cushion that has lost its spring. The fabric may be flawless, yet the seat tells the truth. Cushion filling determines that truth, and it decides whether your upholstery and reupholstery project delivers comfort or regret.
The options differ more than prices suggest:
– High-resilience foam holds shape for years but can feel firm.
– Fibre fillings offer softness but compress quickly.
– Feather and down wraps provide luxury with constant fluffing.
– Foam cores wrapped in fibre balance support and plushness.
Each choice changes the sitting experience. A reupholstery job on a solid frame deserves filling matched to how the sofa will actually be used. Daily family lounging demands durability. Formal occasional seating allows refinement. When you commission professional upholstery and reupholstery, ask which fillings your workshop recommends for your particular frame and habits. The answer shapes every sit that follows.
Essential Upholstery Tools
The average workshop uses more than forty distinct tools, yet the success of a reupholstery project often hinges on fewer than ten. A tack remover, a webbing stretcher, and sharp shears do more than cut fabric; they shape the final geometry of the piece.
Understanding upholstery and reupholstery basics starts with the frame. A technician must strip the old cover, inspect every joint, and repair hidden damage before new material is laid down. Missing this step repeats the original failure. The tools make this possible. Dull blades tear fibres, misaligned tacks weaken edges, and an incorrect hammer can dent the wooden rail.
Essential instruments include:
- A ripping chisel for lifting old tacks
- A webbing stretcher for tensioning support straps
- Curved needles for deep seat stitching
- A regulator for easing stuffing into place
Workshops that maintain sharp, calibrated instruments produce cleaner edges and longer-lasting repairs. That consistency separates amateur attempts from professional upholstery and reupholstery.
When to Choose Reupholstery Over Replacement
Cost Comparison: Reupholstery vs. Buying New
Reupholstery costs 40 percent less than replacement, but that figure only begins the story. In South Africa, a solid hardwood frame with original springs deserves new life. I have watched friends buy sofas with particleboard bases, then wonder why they sag in two years. The old chair with a tired cover might hold the very comfort you chase.
Replacement makes sense only when the frame creaks or the wood has rotted. Otherwise, the cost comparison leans heavily toward renewal. You keep the silhouette you love, choose fresh textiles, and preserve the craftsmanship already in your home.
- Sound joinery and stable springs favour reupholstery.
- Sentimental value cannot be priced in store catalogs.
- Structural failure alone justifies buying new.
The discipline of quality upholstery and reupholstery rewards patience. Every rand spent on rework returns a piece that fits your body and your history. That is the arithmetic that matters!
Preserving Sentimental and Antique Value
A family heirloom is not a furnishing. It carries the memory of every gathering held around it. When your grandmother’s armchair still supports you after decades, replacement strips away more than fabric. It erases the story.
The decision to invest in upholstery and reupholstery often hinges on provenance. Antique frames, particularly those crafted from yellowwood or stinkwood, possess joinery that modern factories cannot replicate. If the wood remains sound and the springs hold tension, the piece deserves renewal.
Ask these questions before discarding a cherished item:
- Does the frame retain its original structure?
- Is the carving or detail worth preserving?
- Does holding onto this piece matter to your family narrative?
When the answers lean yes, reupholstery becomes an act of preservation. You honour the past while selecting fabrics suited to your present life. That balance is something no showroom sofa can offer. I believe that is the truest measure of value!
Assessing Structural Damage and Repair Feasibility
A bowed frame or a broken rail does not always signal the end. In fact, the decision between upholstery and reupholstery often rests on what you discover beneath the old covering. Many South African homes contain pieces with mortise and tenon joints that have simply loosened over time. A skilled technician can re-glue and clamp these joints, restoring integrity that a new, particleboard unit will never possess. The frame must be the primary focus of your assessment.
Look for these warning signs that indicate a frame is beyond practical repair:
– Extensive wood rot or termite damage that compromises major structural members.
– Cracks running through the entire thickness of a load bearing rail.
– Previous, botched repairs that have stripped screw holes or split the timber.
When the joinery is sound, the feasibility of repair is remarkably high. Springs can be retied, webbing replaced, and corner blocks reinforced. However, you must also consider the cost of labour against the piece’s intrinsic worth. If the structure is solid, investing in upholstery and reupholstery makes sense. Be prepared for the technician to discover hidden issues during the strip down; this is standard practice. A reputable workshop will quote for the visible work, then discuss repairs as they are uncovered, so you retain control over the budget and the direction of the restoration. This is where the true value of the craft emerges.
Environmental Benefits of Reupholstering
Every year, thousands of tonnes of furniture arrive at South African landfills with intact hardwood frames and working spring systems. The environmental cost of replacement is rarely counted. A new sofa demands virgin timber, petrochemical foams, and fuel for transport. Reupholstering preserves the embodied energy inside the original structure.
The choice of upholstery and reupholstery carries environmental weight. When the frame is sound, keeping it avoids the full industrial cycle of extraction, production, and disposal. The waste stream shrinks dramatically:
- Old coverings are stripped rather than entire units discarded.
- Padding is renewed with modern, sustainable fillings.
- Springs and webbing are repaired, not replaced.
Each intervention extends the piece’s useful life for years. I have seen clients hesitate because the fabric seemed tired, yet the fabric is the most replaceable element. The frame is the environmental investment. Choosing restoration over replacement reduces demand for raw materials and keeps a functional piece in circulation.
Quality Differences in Modern vs. Vintage Furniture
Only about 30% of discarded furniture in South Africa is truly broken. The rest succumbs to aesthetic fatigue or cheap construction. This matters because the quality gap between modern and vintage pieces is not subtle.
Vintage sofas often contain kiln dried hardwoods, hand tied springs, and joinery that outlasts a decade of roughhousing. Modern sofas may rely on particleboard and staples. The choice between replacement and restoration depends on what you are working with. Upholstery and reupholstery is only worthwhile when the structural core deserves the labour.
- Check for dovetail joints and solid wood rails.
- Press the seat. Coil springs should bounce, not sag.
- Lift a corner. A heavy frame usually signals quality.
When those markers hold, restoration beats replacement every time.
The Reupholstery Process Step by Step
Removing the Old Fabric and Trims
The first cut into a tired sofa feels like surgery. A single armchair can yield a kilogram of settled dust and debris, so work outdoors or in a well-ventilated space. Removing old fabric and trims demands patience, not force.
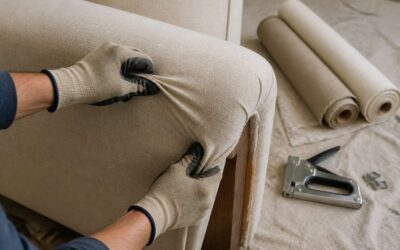
Start with the trims. Use a seam ripper to release piping, welting, and nailheads. Then locate the tack strips beneath the seat and back. A staple remover lifts the webbing anchors with less effort than you would expect!
- Detach the outer arms and back panels first, as they hide the structural staples.
- Peel the main fabric away from the frame, marking each piece with chalk as you go.
- Pull the foam and batting, noting how each layer was attached.
Saving the old fabric as a pattern is the difference between a smooth upholstery and reupholstery job and a misfit cover. Slow removal protects the frame for the next stage.
Repairing and Reinforcing the Frame
Once the old fabric is stripped away, the frame’s true condition becomes visible. A wobbly joint or cracked rail can compromise the upholstery and reupholstery project. Before new padding is laid, the frame must be sound.
Start by inspecting every joint. Loose corners get fresh glue, clamped overnight, then reinforced with screws or dowels. We often encounter wood borer damage in South African pieces; affected sections should be cut out and replaced with hardwood inserts.
- Re-glue loose joints and clamp for 24 hours.
- Add triangular corner blocks to strengthen stress points.
- Replace cracked rails with kiln-dried hardwood.
- Treat borer or fungal damage before proceeding.
Reinforcing the frame now prevents future creaking and misalignment. It creates a stable base for new webbing, springs, and foam. This stage determines whether the piece lasts another decade or fails within months. A well-braced frame makes the rest of the upholstery and reupholstery work predictable.
Replacing Webbing, Springs, and Padding
With the frame braced, the next stage of upholstery and reupholstery begins with the seat’s undercarriage. The old webbing, rotted and sagging, comes off in strips. Fresh jute webbing is stretched taut across the rails, each strip nailed and folded back for grip. The crosshatch pattern must be even. Springs follow, tied to the webbing with twine, then lashed to the frame with a reliable knot pattern.
Padding sits atop this skeleton. High-density foam is cut to shape, bevelled at the edges to avoid a hard lip, and wrapped in polyester wadding for a smooth profile. This layered order matters. Get the tension wrong, and the seat will slump within months. I have watched it happen on pieces that looked perfect at delivery. In South Africa’s climate, where humidity accelerates deterioration, quality materials and proper tension are not optional. Throughout this phase, upholstery and reupholstery demand patience; haste here condemns the chair to premature failure.
Cutting and Sewing the New Fabric
Once the foundation is set, the true artistry of upholstery and reupholstery takes over at the cutting table. Pattern direction becomes an obsession. A floral or striped motif that runs off-kilter will betray the work the moment a client’s eye traces the lines. I have learned to walk the fabric’s full length, assessing the nap and print registration before a single snip is made.
Cutting requires a steady hand and a sharp blade. Each panel is laid out to account for the fabric’s stretch and weave density. Tacking every piece into place with a temporary stitch prevents shifting during the final pass. The sewing itself demands patience, as every critical seam is reinforced with a double row of stitches. A welt cord snaps snappily into place, defining the silhouette.
Common mistakes to avoid when sewing covers:
– Misaligning the pattern across adjacent panels.
– Using the wrong needle gauge for the fabric weight.
– Forgetting to pre-shrink natural fibres.
Once sewn, the shell is pulled over the padding with a rhythmic series of tugs. The result should feel drum tight, yet yield gently to pressure. A trailing thread or a missed pleat is unacceptable at this stage. The entire cover must sit as though it grew there, with the final seam disappearing into the frame’s shadow. This is where the discipline of cutting and sewing truly separates a professional from a hobbyist.
Attaching Fabric and Finishing Details
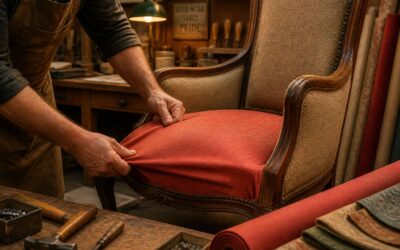
The moment of truth arrives when the freshly sewn shell meets the frame. This is where upholstery and reupholstery reveal their true character. I stretch the cover over the padding, working from the centre outward. Each tug must be deliberate. A crooked seam here will haunt the entire piece.
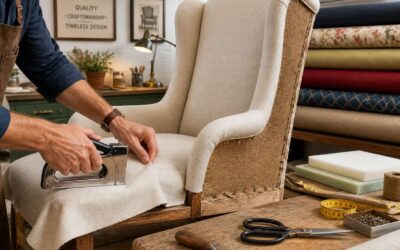
Once the fabric is anchored, I secure the edges with a staple gun, then check every pleat and corner. The finishing details demand the same obsession: Welt cord must sit crisp, and trim must align without puckering.
- Tuck excess fabric neatly into frame crevices.
- Tap decorative nails at a consistent angle.
Finally, I step back and study the silhouette. If anything feels off, I undo and redo. That discipline separates a professional from a hobbyist.
Final Inspection and Assembly
The final inspection is where upholstery and reupholstery succeed or fail. I run my hands along every seam, feeling for uneven tension. I confirm the back panel sits straight and the arms are symmetrical. This is the last chance to correct flaws before the piece leaves the workshop.
I work through the assembly checks:
- Verify all staples are buried so none poke through
- Confirm the dust cover is taut and the feet are secure
- Test every cushion for proper fit and rebound
- Examine the full silhouette from multiple angles
Then I reattach any hardware. I screw in the legs, fix the trim, and set the piece upright. A firm press on the seat tells me the suspension is right. When the piece passes, it earns its place. When it does not, I strip it back down. That discipline is the core of professional upholstery and reupholstery.
Choosing the Right Fabric for Your Project
Durability and Wear Resistance
The right fabric decides whether your upholstery and reupholstery project survives daily life or slips into premature decline. In South Africa, where sunlight streams through uncurtained windows, fade resistance is as critical as wear resistance. The Martindale rub test offers a reliable gauge; ratings above 40,000 indicate durability for busy households.
Weave tightness and fiber composition also determine longevity. Synthetic blends resist stains and moisture, yet a breathable cotton blend might feel better. When evaluating options, inspect the fabric’s hand feel. Run your fingers across the surface; I’ve found this reveals weaknesses that labels hide. A simple checklist helps!
- High rub count
- Tight weave
- UV resistance
Fraying or loose threads signal weakness. These elements matter more than pattern or color. Choosing without this knowledge leads to disappointment, costing time and money. The success of your project hinges on these practical details.
Color, Pattern, and Room Aesthetics
The fabric you choose tells the room’s story before a single piece of furniture is placed. A deep emerald velvet invites shadows and quiet luxury, while a crisp linen in pale sand opens the space to light and air. The color and pattern of your chosen textile are not mere decoration; they set the atmosphere. In South African homes, where interior and exterior often bleed together, the fabric must also bridge the gap between the garden’s wildness and the home’s calm.
Pattern does more than decorate; it can mask the slow erosion of daily use. A busy geometric print hides the occasional stain, while a solid texture demands perfection. Consider the room’s purpose. A formal lounge with little traffic allows for delicate weaves, yet a family den requires a fabric that forgives. The interplay between the existing architecture and the furniture’s new skin must feel intentional.
When surveying the room, think of the item’s position. Is it a solitary armchair by a reading window, or the centerpiece of a shared space?
1. The scale of the pattern should match the size of the piece.
2. The color palette must harmonize with fixed elements like flooring and wall paint.
3. The texture should contrast with other soft furnishings to avoid a flat, monotonous look.
These choices are intimate. Your upholstery and reupholstery project will either fade into the background or command the eye. Light plays a crucial role here; the same fabric appears different in morning sun versus evening lamplight. Always view a sample in the actual room before committing. The wrong shade creates a dissonance that no amount of good craftsmanship can correct, leaving a room feeling unsettled and incomplete.
Maintenance and Cleaning Requirements
Most fabric damage is not the dramatic tear. It is the slow accumulation of grit that grinds fibres down each time someone takes a seat. Upholstery and reupholstery service providers in Durban see it constantly: covers that looked fine for years, then suddenly frayed beyond saving.
A maintenance routine must match your climate. Highveld residents manage fine particulate dust; coastal homes deal with humidity and mildew. The basics hold everywhere:
- Vacuum weekly with a soft brush attachment.
- Blot spills immediately with a clean cloth, never rub.
- Rotate and flip cushions monthly.
Professional deep cleaning every two years lifts embedded soil that home vacuuming misses. Confirm the method with your upholsterer before booking, since some protectants react poorly to steam cleaning. Sensible care doubles the lifespan of any upholstery and reupholstery investment.
Budget-Friendly Fabric Choices
Fabric choice determines whether your upholstery and reupholstery project survives daily life or fails within a season. Match the weave to the room’s traffic before you consider colour. A formal dining chair and a kids’ playroom sofa demand completely different materials.
For budget-friendly projects, polyester blends outperform pure cotton at the same price point. They resist fading and hold their shape under Durban’s humidity. Look for a rub count above 30,000 Martindale cycles before committing.
- Pick velvet for low-traffic lounge chairs only
- Choose canvas or twill for family sofas
- Avoid linen unless you accept creasing and frequent steaming
Expensive fabric layered onto a weak frame wastes money. The upholstery and reupholstery balance only works when the base structure earns the investment.
Fabric Performance Tests and Certifications
A fabric’s performance certificate contains a history of endurance. Martindale rub testing measures surface wear, while Wyzenbeek testing mimics the friction of daily sitting. Lightfastness ratings matter acutely in South African homes, where high UV exposure can fade a sofa within a single summer. Seam slippage tests reveal whether a material will hold its stitching under tension.
These benchmarks convert the upholstery and reupholstery decision from guesswork into measurable certainty. They offer evidence that a fabric will survive its environment. Look for these certifications before you commit:
- Lightfastness ratings gauge resistance to fading under direct sun
- Seam slippage scores indicate whether seams will stay intact under weight
- Pilling grades predict surface fuzz and wear
When all three reports return strong numbers, the fabric earns its place on your frame. When they lack documentation, I treat that as a warning. A sound upholstery and reupholstery plan demands this evidence before any cutting begins.
Hiring a Professional vs. DIY Reupholstery
Skill Level and Experience Required
Stripping a chair to its bare frame takes patience; rebuilding it takes knowledge. I have seen many South African homeowners underestimate the gap between simple fabric replacement and true upholstery and reupholstery. A professional has handled hundreds of frames, webbing, and spring types, while a novice learns on a single piece.
For DIY, you need to master specific techniques!
- Cutting fabric with correct grain alignment
- Tying eight-way hand-tied springs
- Layering foam and batting for proper support
Without these skills, the final piece may look fine but fail after a season. Experience also means knowing when a frame is beyond saving. Hiring a pro removes that guesswork, though at a higher cost. Your choice depends on your comfort with risk and your willingness to learn from mistakes.
Tool Investment and Workspace Setup
Deciding between a professional and a DIY route often comes down to what you already own and where you will work. A serious toolkit for upholstery and reupholstery does not stop at a staple gun. You need a pneumatic stapler, webbing stretcher, spring tensioners, and a sewing machine capable of handling thick fabric. That investment can exceed the cost of hiring a pro for a single chair.
Workspace setup adds another layer. Stripping and rebuilding furniture demands dust control, adequate lighting, and space to lay out large cuts of fabric. Many South African homes lack a dedicated workshop. Without a clean, dry area to store a frame while glue cures, your project becomes a hazard.
For DIY enthusiasts, the list is practical:
- Heavy-duty sewing machine with walking foot
- Staple removers and tack pullers
- Respirator for foam dust and old adhesives
- Large workbench or reinforced table
Hiring a professional for upholstery and reupholstery eliminates these demands entirely. You pay for their expertise, but you also pay for their tools, their ventilated workspace, and their ability to correct mistakes on the spot.
Time Commitment and Project Complexity
A single armchair can swallow three weekends of a DIYer’s life. For anyone weighing upholstery and reupholstery, that timeline assumes no hidden damage. When the old foam crumbles and the webbing shows years of strain, the complexity grows sharply. Professional shops in Cape Town routinely turn around the same piece in two days, but they carry decades of pattern-matching and frame repairs in their process.
Time commitment depends on the project’s true state. A straightforward footstool moves quickly. A 1970s lounge suite with curved arms and welded joints does not.
- Stripping the old cover and trims
- Replacing worn webbing and springs
- Adjusting new fabric to avoid shifting seams
Each of these stages can double your hours if done at home. Pros price these steps upfront. For upholstery and reupholstery, complexity is the deciding factor between a weekend project and a long-term burden.
Full Cost Breakdown of DIY and Professional Services
Almost 60% of DIY upholstery projects run over budget before the first panel is sewn. Fabric suppliers track that figure when clients return for second metre cuts. The costs emerge in tools you assumed you owned, foam cut to the wrong density, and fabric bought twice after a miscut.
Professional upholstery and reupholstery quotes include those corrections upfront. A workshop charges for frame repairs you cannot see, while DIY pricing stops at visible materials. The fixed costs often look like this:
– Rental of industrial staplers and pneumatic tools
– Minimum rolls of matching webbing
– Disposal fees for old foam and tack strips
The professional spreads those costs across a two-day turnaround. The DIYer absorbs them fully over three weekends. For anyone weighing upholstery and reupholstery, the prolonged home project often costs more per hour than a professional’s rate, without the pattern-matching expertise or a guarantee on the finished piece.
How to Find and Vet a Qualified Upholsterer
After comparing those costs, the next step is finding someone who can actually do the work. Professional upholstery and reupholstery in South Africa demands a close look at the workshop, not the website. Ask to see a chair currently stripped to its frame. The webbing tension and the hand-tied springs reveal more than any polished portfolio.
A reliable upholsterer answers the hard questions directly:
- Is the foam density rated for daily use or occasional seating?
- Will the original fabric pattern be matched at the seams?
- Who handles the removal and disposal of the old materials?
The right person also flags hidden damage before you pay a deposit. An empty bench is a warning. A full bench, where the craftsman quotes a deadline and meets it, is the strongest reference you can find. Whether you finalise upholstery and reupholstery plans for a single chair or a full lounge suite, the vetting process stays the same.
Common DIY Mistakes to Avoid
Most DIY reupholstery attempts fail within the first month. The fabric puckers, the seams split, or the springs shift under the first real sitting. A weekend project becomes a costly lesson in the gap between stapling fabric and professional upholstery and reupholstery.
Hiring a professional means paying for the hidden work. The webbing tension, the foam density, the pattern matching. A skilled upholsterer spots frame weaknesses before fabric hides them. DIY mistakes multiply quickly:
- Using the wrong staple length, which splits the timber frame
- Reusing old foam that has already lost its resilience
- Skipping the cotton barrier between foam and fabric
These errors stay invisible at first. Then they surface as sagging cushions or torn seams. A professional charges more upfront but delivers a piece that holds its shape for years. The DIY route often costs double in rework. For upholstery and reupholstery, the frame only gets one chance.

0 Comments