Understanding Leather Upholstery Damage
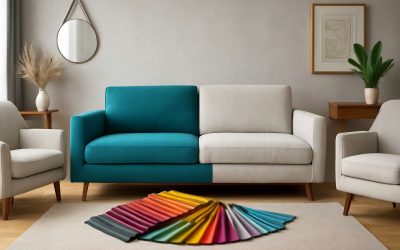
Types of Common Leather Damages – Scratches, tears, cracks, fading, stains
Leather upholstery, cherished for its timeless elegance, often bears the marks of daily life in ways that tell a story of its own. Understanding the types of damage that can afflict leather is essential if you want to master how to repair leather upholstery effectively.
Scratches and superficial scuffs are perhaps the most common, often resulting from casual contact or pet claws. Tears, on the other hand, can appear suddenly—sometimes a careless move or an accident can cause a rip that seems irreparable. Cracks may develop over years of exposure to fluctuating temperatures and humidity, leading to dry, brittle leather. Fading occurs gradually, especially in sunlit areas, diminishing the rich hue that initially captivated you. Stains, whether from spills or coloured substances, can be stubborn, requiring gentle yet precise cleaning methods.
Recognising these damage types is the first step in a comprehensive approach to repairing leather upholstery. Often, addressing these issues involves a nuanced process that balances material restoration and colour matching, ensuring longevity and aesthetic harmony.
Factors Causing Leather Damage – Sunlight, moisture, use wear, poor maintenance
Leather upholstery, a symbol of timeless elegance, faces a relentless battle against the elements and everyday wear. Understanding the factors that cause leather damage is crucial in mastering how to repair leather upholstery effectively. Sunlight, for instance, is a silent adversary—its ultraviolet rays gradually strip away colour and elasticity, leaving the leather dry and brittle. Moisture adds another layer of complexity; excess humidity can lead to mould growth or swelling, while sudden spills risk staining and staining can be stubborn if not addressed promptly.
Use wear is an inevitable consequence of daily life, especially in high-traffic areas. Over time, repeated friction weakens the surface, making it more susceptible to tears and cracking. Poor maintenance compounds these issues, as neglecting regular cleaning and conditioning accelerates deterioration. Recognising these damage factors allows you to appreciate the importance of protective measures and informed repairs. When learning how to repair leather upholstery, understanding these underlying causes ensures that restoration is both effective and long-lasting.
Assessing the Extent of Damage – Determining repair feasibility and urgency
Leather upholstery is an investment that commands respect — and if you’re not careful, it can turn into a source of frustration faster than you can say “cracked leather.” When assessing damage, it’s crucial to determine how serious the injury truly is. Is that tiny scratch just a surface scuff, or a sign of deeper, structural decay? Understanding this distinction helps you gauge whether you’re looking at a quick fix or a full-blown restoration project.
To evaluate the extent of damage, consider the following steps: first, inspect the affected area for cracks or tears that may compromise the integrity of the leather. Next, check for colour fading or discolouration, which can indicate underlying moisture issues or prolonged sun exposure. Finally, evaluate the overall texture—if the leather feels dry or brittle, it’s a telltale sign that repair work needs to be both timely and thorough. Knowing when to jump into the repair process hinges on these assessments, preventing further deterioration and ensuring your furniture remains a symbol of sophistication for years to come.
- Assess the severity of cracks, tears, or stains.
- Determine if the damage is superficial or structural.
- Evaluate the leather’s moisture and elasticity levels.
- Decide whether the damage requires simple cleaning or a comprehensive repair.
Preparation Before Repairing Leather Upholstery
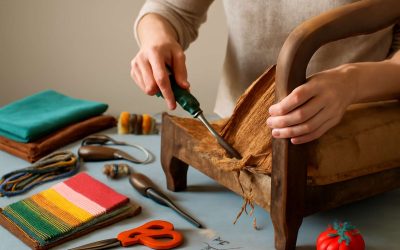
Gathering Necessary Tools and Supplies – Leather cleaner, conditioner, repair kit, adhesives
Before embarking on the delicate dance of how to repair leather upholstery, a thorough preparation phase is paramount. Think of it as setting the stage for a flawless performance—neglect this step, and even the most skilled repair can fall flat. Gathering the necessary tools and supplies might seem mundane, but it’s the foundation of any successful restoration. A well-stocked repair kit, comprising specialised adhesives, colour-matching dyes, and protective conditioners, is your toolkit for victory.
To ensure your repair efforts are both effective and long-lasting, consider assembling the following essentials:
- Leather cleaner to remove dirt and oils that can hinder adhesion
- Leather conditioner to restore suppleness post-repair
- Repair kit with patches, fillers, and colourants
- Appropriate adhesives designed specifically for leather
Gathering these supplies before you begin not only saves time but also ensures you’re prepared for unexpected hiccups. Remember, a meticulous approach in this preparatory stage often differentiates a mere patch-up from a professional-grade repair—so equip yourself properly, and your leather upholstery will thank you for the care and attention given at this early stage.
Cleaning the Leather Surface – Proper cleaning techniques to remove dirt and oils
When contemplating how to repair leather upholstery, the initial act of cleaning transcends mere surface tidiness; it is an essential ritual that unveils the true character of the leather beneath. Dirt, oils, and residual grime form a stubborn barrier, sabotaging the adhesion of repair compounds and compromising the integrity of the restoration process. Without a meticulous cleansing, even the most skilled repair can appear superficial or uneven.
To achieve a pristine surface, employ a gentle yet effective leather cleaner—preferably one formulated specifically for delicate hides. Using a soft cloth, gently wipe the surface in circular motions, ensuring you reach all creases and seams. For stubborn stains or ingrained oils, a secondary application may be necessary. Once the leather appears revitalised, allow it to dry thoroughly before proceeding. This step, seemingly mundane, is the linchpin that transforms a cosmetic fix into a lasting repair.
Remember, the quality of your cleaning directly influences the durability of your restoration. Proper preparation, including thorough cleaning, is the key to learning how to repair leather upholstery with a seamless, professional finish. It’s not just about aesthetics; it’s about respecting the leather’s intrinsic nature and ensuring your repair effort endures the test of time.
Inspecting for Hidden Damage – Checking for structural issues beneath the surface
Before diving headfirst into how to repair leather upholstery, it’s vital to perform a thorough inspection—because hidden damage can turn a seemingly simple fix into a never-ending saga. Leather isn’t just about surface appearance; beneath that sleek exterior, structural issues might be lurking, waiting to sabotage your best efforts. Think of it as an archaeological dig—except instead of ancient artefacts, you’re excavating for signs of weakness or compromise.
Look for cracks that extend beyond the surface, sagging areas, or seams showing signs of separation. These can be subtle, sneaky defects that weaken the overall integrity of the piece. For a comprehensive assessment, consider checking for:
- Loose or frayed stitching
- Discolouration indicating moisture damage
- Unusual softness or firmness, hinting at internal issues
By carefully examining these elements, you’ll determine whether the damage is purely cosmetic or if deeper structural repairs are necessary. Remember, understanding the extent of damage is the cornerstone of knowing how to repair leather upholstery effectively, ensuring your efforts stand the test of time rather than collapsing into a patchwork of temporary fixes.
DIY Repair Techniques for Leather Upholstery
Fixing Surface Scratches and Scuffs – Using leather repair creams and colorants
Surface scratches and scuffs can tarnish the elegance of even the most luxurious leather upholstery, but fear not—there’s a surprisingly effective way to restore its original luster. Using leather repair creams and colourants is a game-changer, offering a seamless fix that blends imperfections into the overall look. The secret lies in selecting the right shade; a colourant that closely matches your leather’s hue will ensure the repair remains discreet yet durable.
Applying these products requires patience and a delicate touch. Start by cleaning the surface thoroughly to remove any dust or oils that could interfere with adhesion. Then, carefully apply a thin layer of the repair cream, working into the scratch or scuff with a soft cloth or sponge. For best results, multiple light coats are preferable to one heavy application, allowing each layer to dry fully before proceeding. A quick tip—use a colourant that offers flexibility, preventing the repair from cracking or peeling over time.
To achieve a flawless finish, consider using a leather-specific finishing sealant after the colourant has dried. This adds an extra layer of protection, helping the repair withstand everyday wear and tear. For those curious about how to repair leather upholstery, mastering these simple techniques can save a fortune and extend the life of your furniture, all while maintaining its timeless appeal.
Repairing Tears and Cuts – Applying leather patches and flexible adhesives
Leather, with its dark allure and whispering stories of elegance, can be marred by the cruel touch of tears and cuts—those jagged scars that threaten to destroy its mystique. Knowing how to repair leather upholstery from such grievous wounds demands a delicate hand and an understanding of the secrets hidden within a leather repair kit. When a tear appears, it’s not merely a surface flaw; it’s a breach in the fabric of time, a reminder that even the most resilient leather is vulnerable to the ravages of age and neglect.
Applying a leather patch becomes an act of quiet rebellion, a way to reclaim the piece’s integrity. Carefully cut a patch from matching leather, ensuring its edges are smooth and precise. Using a flexible adhesive, press the patch into place, holding it firmly until it bonds with the surrounding material. For a seamless repair, opt for a leather-specific glue that remains supple after drying, preventing future cracking or peeling. To enhance durability and aesthetic appeal, some opt to reinforce the patch with a thin layer of repair filler before colouring.
To truly master how to repair leather upholstery, patience is paramount. The process involves meticulous preparation—cleaning the area, selecting the right adhesive, and allowing each layer to set fully. Remember, the goal is not just repair but resurrection—restoring the leather’s haunted beauty, one ghostly scar at a time.
Restoring Faded Leather – Color restorer and dye options
Faded leather can transform a once-lustrous piece into a ghostly remnant of its former glory. Luckily, restoring its rich hue isn’t just a matter of luck — it’s a science that can be mastered with the right colour restorer and dye options. The secret lies in understanding the nuances of leather dyeing, where precise application can revive even the most ghostly shades. When considering how to repair leather upholstery, selecting the correct colourant is paramount to achieving a seamless blend that preserves the leather’s natural beauty.
Start by choosing a leather dye that matches the original colour—whether that’s deep ebony, warm caramel, or vintage chestnut. For larger areas, an airbrush or sponge can ensure uniform coverage, avoiding streaks and patches. If fading is uneven, using a colour restorer designed specifically for leather can help rehydrate and recolour, bringing life back into dull patches. Remember, patience is key — layered application often yields the most authentic finish, especially when working with antique or delicate leather. The goal is to make the repair invisible, restoring the piece’s haunted charm rather than replacing its mystique with a mask of artificial colour.
To enhance the longevity of your repair, consider sealing the dyed surface with a protective finish. Whether you opt for a matte or satin sheen, this step guards against future fading and wear. When mastering how to repair leather upholstery, understanding these subtle techniques transforms a mundane task into a craft—where every stroke and shade contributes to the resurrection of a piece’s enduring allure.
Treating Cracks and Creases – Leather conditioner and flexible fillers
Cracks and creases in leather upholstery aren’t just an eyesore—they can threaten the very soul of your cherished piece. But fear not! With the right approach, you can breathe new life into those fissures, transforming a tired surface into something that whispers stories of elegance and resilience. The secret lies in using leather conditioner and flexible fillers, which work together to restore suppleness and fill in those unsightly cracks seamlessly.
Begin by gently cleaning the affected area with a specialised leather cleaner, ensuring all dust and oils are removed—this prepares the leather for optimal adhesion. Once dry, apply a high-quality leather conditioner to hydrate the surface, making it more receptive to repair. For deeper creases and cracks, a flexible filler designed specifically for leather becomes your magic wand. This filler is malleable, allowing it to bend and stretch with the leather, preventing future splitting. When applying the filler, use a spatula or palette knife to carefully press it into the cracks, smoothing the surface to match the surrounding texture.
For the most natural finish, follow up with a colourant or dye—matching your leather’s original shade—to conceal the repair. The process is akin to restoring a piece of ancient parchment—delicate, precise, and rewarding. Remember, patience is your ally. Layering the filler in thin coats and allowing each to cure fully will yield the most authentic, long-lasting results. With these techniques, mastering how to repair leather upholstery becomes less of a mystery and more of an art—a craft that preserves history, comfort, and style in one seamless stroke.
Advanced Leather Repair Methods
Replacing Damaged Leather Sections – Removing old patches, installing new leather
When the fabric of leather upholstery begins to fray or deteriorate beyond superficial blemishes, advanced repair methods come into play. Replacing damaged leather sections is a meticulous process that demands patience and a keen eye for detail. The first step involves removing old patches, which often requires a gentle yet firm approach to avoid further damage to the surrounding material. Carefully peeling away compromised areas exposes the underlying structure, revealing whether the damage extends deeper into the padding or frame.
Once the damaged leather is excised, selecting an appropriate replacement becomes essential. Genuine leather or high-quality faux options can be seamlessly integrated, matching the original colour and texture. Installing new leather involves precise trimming and adhesive application, ensuring a smooth, flush finish. For those seeking a durable, long-lasting repair, employing flexible adhesives and specialised tools, like leather seam rollers, guarantees a professional-grade outcome. Knowing how to repair leather upholstery effectively can transform worn, damaged furniture into a stunning piece of craftsmanship, restoring both aesthetic appeal and functionality with finesse.
Color Matching and Custom Touch-ups – Using professional dyes and color mixing
When it comes to restoring leather upholstery, colour matching is crucial. A perfect match makes repairs virtually invisible, preserving the furniture’s original charm. Professional dyes and custom mixing techniques allow for precise colour matching, blending seamlessly with the existing leather. This process involves analysing the leather’s hue, saturation, and texture, then carefully blending dyes until a near-identical shade is achieved.
For small imperfections like scratches or scuffs, applying specialised leather repair creams and colourants can do wonders. These products not only restore colour but also help conceal blemishes effectively. When repairing larger damage, a custom touch-up using high-quality dyes can revive faded leather, giving it a fresh, renewed appearance. The key lies in patience and attention to detail, ensuring each layer of colour is evenly applied for a natural finish.
- Matching the texture and gloss level
- Using multiple thin coats rather than one thick layer
- Allowing adequate drying time between applications
Mastering how to repair leather upholstery with custom colour matching elevates the overall repair quality. It transforms a patched-up surface into a piece that looks as good as new, with a finish that’s durable and aesthetic. Whether tackling minor scratches or significant fade, the right techniques make all the difference in achieving a professional-grade result.
Refurbishing Leather to Look New – Polishing, conditioning, and sealing
In the shadowed corners of furniture restoration, the true art lies in transforming worn, faded leather into a surface that whispers of timeless elegance. Mastering how to repair leather upholstery involves more than superficial fixes; it’s about breathing new life into aged material through advanced methods of refurbishment. Polishing, conditioning, and sealing are the final rites in this ritual—each step essential to achieving a lustrous, almost otherworldly finish that withstands the test of time.
To restore a leather piece to its former glory, one must approach with patience and precision. The process begins with meticulous cleaning—removing dirt and oils that dull its natural beauty. Following this, conditioning injects vitality into the leather, replenishing its suppleness and preventing future cracks. Sealing then safeguards the surface, locking in colour and gloss while creating a barrier against environmental damage.
Ever wondered how to repair leather upholstery so it looks as good as new? Consider the power of multiple thin coats of high-quality dye—each layer carefully applied to build depth and richness without overwhelming the material. This layered approach ensures a seamless blend, restoring faded patches and concealing scars of time. When executed with skill, these advanced repair techniques elevate the leather’s appearance to an almost spectral perfection—resilient, radiant, and eternally captivating.
Tips for Maintaining Leather Upholstery Post-Repair
Regular Cleaning and Conditioning – Extending the lifespan of leather
Once you’ve mastered how to repair leather upholstery, maintaining its pristine condition becomes equally vital. Leather, a material of timeless elegance, can thrive for decades with the right care—yet neglect can swiftly undo even the most expert repairs. Regular cleaning and conditioning serve as guardians, preventing dirt and oils from settling into the pores and causing premature wear. A gentle wipe with a soft cloth and specialised leather cleaner keeps surfaces spotless, while an application of quality conditioner restores suppleness and forms a protective barrier against environmental insults.
To extend the lifespan of your leather furniture, consider incorporating a routine that includes a few simple steps. First, always avoid direct sunlight, which can accelerate fading and cracking. Second, schedule periodic conditioning—ideally every 6 to 12 months—to nourish the material. If you notice subtle cracks or faded patches, colour restoration can work wonders, blending in repairs seamlessly. Remember, a well-maintained piece not only looks stunning but also preserves its structural integrity, making your journey of how to repair leather upholstery a worthwhile investment in longevity and charm.
Avoiding Common Causes of Damage – Protective measures against sunlight and moisture
Leather, a symbol of enduring elegance, demands respect and careful stewardship. Once you learn how to repair leather upholstery, it’s tempting to believe the journey is complete—yet the real mastery lies in preservation. Protecting your investment means understanding the subtle forces that threaten its longevity. Sunlight, moisture, and everyday use can chip away at even the most resilient pieces, leaving behind damage that can seem insurmountable. But with vigilant maintenance, you can safeguard your furniture’s integrity and beauty for decades.
One of the most effective protective measures is to shield your leather from direct sunlight—UV rays are insidious, fading colour and causing cracks over time. Moisture, in particular, can be a silent enemy, seeping into the fibres and weakening the material’s structure. To prevent this, consider using slipcovers or placing your furniture away from windows and heat sources. Regularly inspecting your leather for early signs of damage allows you to act swiftly, whether it’s a small scratch or a subtle fade. Remember, prevention is always better than repair, especially when it comes to how to repair leather upholstery, which often involves complex restoration processes.
Incorporating a few simple habits can make a profound difference. For example, maintaining a controlled environment with stable humidity levels helps preserve the leather’s suppleness. Additionally, using a protective leather sealant creates a barrier against environmental insults, prolonging the life of your furniture. When cleaning, opt for a gentle, pH-balanced leather cleaner to remove dirt and oils without stripping natural oils—this prevents premature cracking and fading. If you notice any damage, addressing it early with specialised repair kits ensures your leather’s character remains intact. These small but deliberate actions form a shield, enabling your furniture to resist the relentless march of time and use.
Periodic Inspection and Prevention – Early detection of wear and tear
Leather, with its timeless allure, demands more than just occasional care; it thrives on vigilant guardianship. Regular inspections can unveil the earliest whispers of wear and tear, allowing you to intervene before minor flaws blossom into irreversible damage. Early detection is the secret weapon in how to repair leather upholstery effectively, preserving its integrity and beauty for decades to come.
By adopting a routine of gentle yet thorough examination, you can catch subtle signs such as tiny cracks, fading patches, or loose stitching. These delicate clues often precede larger issues, and addressing them promptly can save you from costly repairs down the line. Incorporating simple habits—like keeping your leather away from direct sunlight and maintaining consistent humidity—fortifies your furniture’s resilience.
To further bolster your efforts, consider implementing a basic maintenance schedule that includes:
- Monthly cleaning with a pH-balanced leather cleaner
- Biannual conditioning to maintain suppleness
- Immediate attention to emerging scratches or scuffs with repair creams and colourants
Such proactive measures form an invisible shield, ensuring your leather remains supple, vibrant, and structurally sound. Remember, mastering how to repair leather upholstery isn’t just about fixing damage—it’s about nurturing your furniture’s soul through continuous, mindful care.
When to Seek Professional Leather Repair Services
Signs That Require Expert Attention – Large tears, structural damage, extensive fading
Sometimes, damage to leather upholstery transcends simple fixes and calls for professional intervention. Large tears, structural damage, or extensive fading are clear signs that expert leather repair services are needed. Attempting to repair these issues yourself can sometimes worsen the damage or result in an uneven finish. Recognising when to seek professional leather repair services is crucial for preserving both the aesthetic and structural integrity of your furniture.
If you notice large tears or cuts that expose foam or padding beneath, it’s time to call in specialists. Similarly, structural damage—such as weakened seams or sagging sections—requires the attention of an experienced artisan. Extensive fading that cannot be remedied through common DIY dyeing techniques also indicates professional intervention might be necessary. These signs suggest that the damage has penetrated beyond surface scratches, demanding expert tools and techniques to restore your leather’s original splendor. Knowing when to seek professional leather repair services ensures your furniture remains durable, beautifully maintained, and worth every penny spent.
Choosing a Reliable Leather Repair Specialist – Research, reviews, portfolio
When the damage to your leather upholstery surpasses minor scratches or fading, it’s a sign that professional intervention may be necessary. Recognising the right moment to seek expert assistance is vital in maintaining the longevity and beauty of your furniture. If large tears, structural issues, or extensive discolouration are present, attempting to fix these problems yourself can often lead to further deterioration or uneven results.
Choosing a reliable leather repair specialist hinges on thorough research. Look for professionals with an impressive portfolio of successful repairs and positive customer reviews. A reputable artisan will have the experience and tools required to restore your leather to its original splendour. Remember, investing in skilled craftsmanship ensures your furniture remains both durable and aesthetically pleasing, making it worth every penny spent.

0 Comments