Evaluating Chair Condition Before Refurbishing
Assessing Frame Integrity and Joint Stability
Before you commit to reupholstery dining room chairs, examine the frame carefully. A beautiful new fabric cannot fix a broken leg. I always start by placing pressure on each corner and rocking the chair gently. Movement indicates worn joints. Inspect the joints where the legs meet the seat rails and where cross-stretchers connect. Look for gaps, cracking, or loose glue. Solid joints are essential. Common problems include:
- Split tenons at the seat rail
- Dowel looseness in the back posts
- Cracked corner blocks
If any of these appear, the frame needs repair before you think about upholstery. Otherwise, the entire structure will fail in a year. A little diligence now saves you from repeating the process.
Identifying Padding and Foam Deterioration
A worn seat cushion gives no warning. The fabric looks fine from above, but the padding underneath has been collapsing for years. Many homeowners only notice the discomfort after guests leave.
Press your thumb into the centre of the seat. Does it spring back? If it stays indented or feels gritty, the foam is deteriorating. Lift the fabric and inspect the padding. Crumbling yellow or brown particles signal that reupholstery dining room chairs need new foam.
- Check for uneven surfaces under the cloth
- Smell for stale odours trapped in the padding
- Look for dust or powder escaping from seams
These signs mean the cushioning has broken down. Your project must include replacing the foam to restore proper support.
Spotting Fabric Wear, Stains, and Structural Damage
Every dining room chair that enters the workshop shows its age on the surface. I run my hand across the fabric, feeling for snags and worn patches. Morning light from a Johannesburg window reveals sun fading the eye cannot always catch. The corners reveal the truth first. Forearms have rubbed the piping raw over years of dinner conversation. Coffee rings and candle wax mark the seat, reminders of lively dinners.
The inspection requires patience. Seat cushions receive the roughest treatment, but the backrests tell their own story:
- Check for frayed edges along the top rail
- Look for crushed fibres that have lost their spring
- Test whether the fabric has stretched loose from the frame
Stains demand honesty. Oil based marks bleed through new fabric completely, ruining fresh work within months. When the fabric fails and the frame remains sound, reupholstery dining room chairs become a practical investment.
Deciding Between Full Restoration and Simple Seat Updates
When a chair arrives at the workshop, the decision between full restoration and a simple seat update depends on more than first impressions. I ask about the chair’s history and how many more decades they expect from it. For reupholstery dining room chairs, the answer shapes the project.
A full restoration suits heirloom pieces that carry sentimental weight. Simple seat updates work for chairs needing a fresh look without the expense. Both are valid paths in reupholstery dining room chairs, but only careful evaluation reveals which one the chair truly requires.
I weigh three things:
- The age and origin of the piece
- The daily wear each chair endures
- The client’s budget and timeline
Each chair tells me what it needs. Sometimes a new seat cover is enough. Other times, the whole chair requires more. The honest answer comes from looking, not guessing.
Selecting Fabrics and Materials for Long-Lasting Results
Understanding Fabric Durability and Weave Density
A fabric for reupholstery dining room chairs is a decision about how you live. A loose weave may look elegant, but it will snag under the constant friction of daily use. The rub count, measured in Martindale cycles, reveals how much abrasion the cloth can survive. For dining chairs, aim for at least 30000 cycles. I also hold the fabric to the light to inspect weave density. Gaps between threads mean early wear.
- The type of yarn. Twisted filaments resist pilling.
- The backing. A bonded backing adds structural stability.
- The dyeing method. Solution dyed colour lasts longer than surface dye.
A tight twill or dense basket weave will outlast a soft chenille, which is often fragile despite its plushness. The right fabric should feel solid without demanding constant care. I have learned to distrust materials that feel too silky, because they rarely hold up in a dining room. Pick something durable, and your reupholstery dining room chairs will serve you for years!
Matching Texture and Pattern to Your Dining Space
A dining chair’s fabric endures everything from Sunday roasts to late night coffee. In South Africa, where the dining room often doubles as a workspace, texture and pattern need to work harder than mere decoration. When I guide clients through reupholstery dining room chairs, I always advise choosing a weave that feels inviting but resists the visual chaos of daily life. A deep houndstooth or subtle stripe can anchor a busy room, while a plain fabric in a rich colour lets the chair’s shape lead.
Consider the scale of your space. Large patterns suit generous rooms; small repeating motifs flatter compact chairs. The fabric’s nap, like velvet, will shade differently depending on light. If uncertainty lingers, order a half metre and drape it over the chair for a week. That sample will reveal more than any photograph, saving your reupholstery dining room chairs from a costly mistake.
Choosing the Right Foam Density and Thickness
Most people choose fabric first and foam second. That order creates problems. The wrong density turns a beautiful chair into a source of discomfort within months. For reupholstery dining room chairs, pressing a thumb into the foam reveals its quality. It should recover quickly but not feel like a trampoline.
Foam density is the material’s weight per cubic meter. Higher density offers more support. Thickness controls how deep you sink. A seat for a 50 kg person needs at least 75 mm of high density foam. For everyday use, 100 mm provides comfort without losing shape.
- Check the ILD rating to measure firmness, not quality.
- Use medium firmness for long dinners.
- Pair quality foam with a protective layer.
Fabric selection follows the same logic. A durable weave means little if the foam fails. Match the material to the room. A sunny breakfast nook benefits from fade resistance. A formal dining space allows softer cloth. Each choice affects how long your reupholstery dining room chairs hold up. Testing samples under natural light avoids disappointment.
Exploring Eco-Friendly and Stain-Resistant Options
The average dining chair endures decades of minor spills, sharp crumbs, and seasonal humidity shifts. Choosing fabric for reupholstery dining room chairs becomes a test of patience, not just colour preference. Eco-friendly options now deliver durability without the chemical baggage of conventional textiles. Consider organic cotton, hemp, or recycled polyester blends that survive daily use while reducing environmental strain. These fibres resist fading and pilling, especially when woven tightly.
Stain resistance no longer depends on toxic coatings. Modern finishes use water-based barriers that repel liquids, yet allow the fabric to breathe. For households with children or regular dinner parties, this makes clean-up effortless.
Sustainable materials worth exploring:
– Linen and wool blends offer natural moisture absorption
– Bamboo-derived rayon adds softness and strength
– Recycled PET yarns mimic synthetic durability
Each choice directly affects how long your reupholstery dining room chairs retain their appearance. Match the textile to your lifestyle, and the seats will forgive small accidents for years.
Calculating Yardage and Other Material Requirements
A typical dining chair seat needs 0.7 meters of fabric, but measuring errors cause half of all reupholstery failures. So before examining swatches, measure the true surface area. Reupholstery dining room chairs require treating the seat top, the front panel, and the backrest as three separate sections.
Selecting fabric for long-lasting results means prioritizing compression recovery. A dense polyester weave wears better than a loose cotton linen blend, especially over thick foam that compresses and releases daily.
To calculate yardage, follow this order:
- Measure the widest point of the seat
- Add twice the drop depth plus 10 cm for staples
- Multiply by the number of chairs
- Add 15 percent for pattern matching and errors
This math, done honestly, ensures your reupholstery dining room chairs survive family dinners without a second redo.
The Refurbishment Process: Tools and Techniques
Essential Hand Tools and Stapling Equipment
People rarely throw out a dining chair because the frame cracked. They discard it because the fabric tore or the seat sagged. That means reupholstery dining room chairs is mostly a job for the workbench, not the sewing machine. The essential hand tools are few, but they must be correct. A tack remover and a mallet break the old fixings free without gouging the wood. A webbing stretcher applies steady tension to new straps, something fingers simply cannot do alone.
For the stapling phase, consider what the job actually demands:
- Pneumatic staple gun for hardwood rails
- 10mm and 12mm galvanised staples
- Curved upholstery needles for piping and corners
- Cranky or magnetic tack pullers for buried fasteners
A hammer would work, but in reupholstery dining room chairs, a pneumatic gun seats each staple flush in a single stroke. The angle matters. Drive staples at 45 degrees, never straight down. Straight staples pull out under the strain of a person leaning back. Pull the webbing taut before each squeeze. This holds the structure firm for years.
Removing Old Fabric and Padding Safely
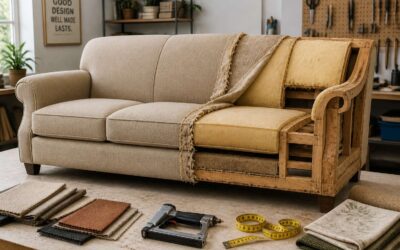
Removing old fabric from reupholstery dining room chairs requires restraint, not force. Flip the chair upside down on a padded bench. Slide the tack remover under the staple line and tap the mallet handle to break the hold. Pry gently. Gouged rails are hard to repair.
Work in a clockwise pattern around the seat frame. Lift each layer carefully and note what it is: the dust cover, the hessian, the foam block, the cotton wadding. That order becomes your assembly guide when the new materials go in.
1. Remove the dust cover and discard it.
2. Pull the webbing staples from the underside of the frame.
3. Lift the entire seat pad assembly away from the rails.
4. Strip the top fabric from the foam block.
Keep old fabric pieces intact. They serve as cutting templates for the new material. The frame is the only part you are trying to save. Everything else is disposable. Work slowly and the reupholstery dining room chairs reward you with a clean, reusable shell.
Cutting, Stretching, and Securing New Upholstery
The moment you cut into new fabric is the moment reupholstery dining room chairs become a genuine project. Old fabric pieces serve as templates, but you need a 5 cm seam allowance around each edge, enough to wrap the rails without excess bulk.
Cutting is only half the battle. Stretching demands patience and technique.
– Set the seat upside down and centre the fabric over the cushion.
– Staple the middle of the front rail first.
– Pull the fabric taut to the opposite rail, then staple.
– Move to the sides, easing out wrinkles as you go.
The pneumatic stapler runs at high pressure, so test on scrap wood first. Drive staples flush with the rail surface. A staple left proud will snag the dust cover fitted later. Properly executed, reupholstery dining room chairs yield a smooth, tight seat that holds its shape for years.
Professional vs. DIY: Making the Right Choice
Comparing Cost Estimates for Hiring a Specialist
In Johannesburg, a professional reupholstery dining room chairs project can cost anywhere from R350 to R800 per chair, depending on the fabric and foam. Your own labour, of course, is free, but the learning curve is not.
Consider the price of mistakes. A staple gun misfire or a misaligned pattern can send you back to the fabric store, and suddenly your budget looks different. For many, the satisfaction of a handcrafted result outweighs the savings.
- Professional quotes include time, materials, and a warranty.
- DIY costs hide trial and error, replacement fabric, and tools.
When you compare the final appearance, the specialist’s work often warrants the premium. The difference is visible in the corners, the pleats, and the straightness of the seams.
Time Investment and Skill Level Required for DIY
Reupholstery dining room chairs is not a weekend project. It is a discipline that demands patience. A single chair can consume four to six hours of focused labour for a beginner, before factoring in pattern alignment and foam cutting. The time commitment for reupholstery dining room chairs often surprises first-timers.
The skill curve is equally demanding. Professional upholsterers spend years mastering tack strips and double welting. A novice must learn these techniques while managing a family schedule. Most beginners produce acceptable work, while the corners and pleats show their inexperience.
Success depends on several factors:
- Time available for practice and correction
- Ability to accept and fix mistakes without frustration
- Patience with repetitive stapling and stretching tasks
My own first project taught me that the real question emerges after the first attempt. Will you accept the imperfections, or will you start over? That decision defines the entire experience!
Handling Complex Details like Tufting and Nail Head Trim
Choosing between a professional and your own hands often comes down to the details you cannot see at first glance. Tufting demands symmetry. Nail head trim requires precision along every curve. These elements expose the difference between covering a chair and crafting its form.
For reupholstery dining room chairs, a specialist brings years of experience. Your weekend labour may hold its own charm, but a deep button pull or a pleat tests your resolve. I have seen beginners cry over a misplaced tack.
- Ask whether your frame can tolerate another round of tension.
- Measure your own tolerance for unraveling a row of buttons.
Professionals absorb those risks. DIY absorbs your time. The right choice depends on which cost you can bear.
Maintenance and Care for Refurbished Chairs
Daily Cleaning and Vacuuming Routines
After months of careful restoration, the last thing you want is daily wear undoing your work. Your reupholstery dining room chairs become part of the room’s heartbeat, but they also face the steady rhythm of meals and afternoon tea. A disciplined cleaning routine keeps those pristine fibers intact.
Start with a vacuum fitted with a soft brush attachment. Move it over the seat and backrest in deliberate strokes. For the undercurves where the cushion meets the frame, switch to a crevice nozzle. A weekly pass prevents dust from grinding into the weave.
Keep a dry microfiber cloth in your sideboard for quick touch-ups. If a spill happens, blot with a barely dampened cloth and let it air dry. Scrubbing loosens yarns. Establish a simple habit:
- Vacuum every surface weekly
- Inspect seams for pulled threads
- Blot spills immediately without applying pressure
This preserves the finish of your reupholstery dining room chairs.
Protecting Fabric from Sunlight and Moisture
Sunlight is a quiet problem. The South African sun, especially in Cape Town or Johannesburg, can fade fresh fabric within months. Ultraviolet rays weaken the weave and bleach the colour. Positioning your reupholstery dining room chairs away from north facing windows helps, but sheer curtains or blinds offer a practical barrier.
Moisture brings its own threats. A damp cloth left on an armrest can leave a watermark. Humidity, common in coastal areas like Durban, can encourage mildew beneath the seat. Check the underside of your reupholstery dining room chairs every few weeks.
Consider these precautions:
- Keep chairs at least a metre from direct sunlight
- Use coasters under drinks, never rest wet glasses on the seat
- Ensure the room breathes to avoid trapped humidity
Re-Tightening Staples and Refreshing Cushion Fluff
After months of use, the staples anchoring your reupholstery dining room chairs can loosen. A slight give in the fabric when you sit is the first warning. Check the underside of each chair every quarter. Use a staple lifter to remove any that have slipped, then drive fresh ones in at a slight angle for better purchase. This small act prevents sagging and extends the life of your work.
- Inspect the perimeter, especially the front edge where stress is highest.
- Work in a circular pattern, tightening opposite sides to keep the fabric even.
Re-tightening is a chance to address cushion fill. Foam and fibre compress over time. Plump the seat and back cushions by kneading them with your hands. For a deeper refresh, unzip the covers and fluff the inner padding. I have seen this simple routine restore comfort for years to come.
When to Schedule Professional Deep Cleaning
Even the most diligent owner of reupholstery dining room chairs eventually faces the limits of home care. Dust settles into the weave, and oils from skin bond with the fibres beyond what a vacuum can lift. I tell clients to book a professional deep cleaning every eighteen to twenty four months, depending on use.
You know it is time when the fabric feels stiff, or when a gentle rub releases a faint musty smell. A technician uses extraction methods that remove the residue without crushing the padding. This service protects the investment and keeps the room welcoming.

0 Comments