Understanding ATV Seat Reupholstery
Benefits of Reupholstering Your ATV Seat – Enhancing comfort, extending seat lifespan, customizing appearance
In the rugged world of off-road adventures, an ATV seat isn’t just a component—it’s a vital link between rider and terrain, a symbol of resilience in the face of nature’s relentless challenge. Reupholster ATV seat, when done with care and precision, transforms not only the comfort but also the very essence of your riding experience. It’s an art rooted in both durability and aesthetic finesse, ensuring your machine remains a faithful companion through countless journeys.
Reupholstering your ATV seat offers profound advantages that often go unnoticed. Beyond the immediate boost in comfort, it significantly extends the lifespan of the seat, shielding it from the wear and tear that comes with every adventure. Customising the appearance allows you to infuse personal style into your rugged machine, turning a utilitarian object into a statement of individuality. Whether you prefer sleek, modern materials or rugged, textured fabrics, reupholster ATV seat services open a world of possibilities to elevate your ride’s visual and functional appeal.
Investing in reupholstery is more than a maintenance choice; it’s a declaration of care and craftsmanship. The process breathes new life into an essential component, blending resilience with elegance—an enduring testament to the spirit of exploration. When you opt to reupholster ATV seat, you’re not simply refurbishing; you’re reimagining what your machine can become—more comfortable, more durable, more uniquely yours. It’s a celebration of the journey, stitched together with quality and passion.
Signs You Need to Reupholster Your ATV Seat – Worn-out foam, cracked vinyl, discomfort during rides
Every off-road enthusiast knows that a worn-out ATV seat can quickly turn a thrilling ride into a discomforting ordeal. Signs that it’s time to reupholster ATV seat are often subtle but unmistakable. Cracked or peeling vinyl not only looks unsightly but also exposes the foam beneath to the elements, accelerating deterioration. If your seat feels less supportive or develops persistent sagging, it’s a clear indicator that reupholster ATV seat is overdue.
Discomfort during rides is a common warning sign. When the foam becomes compressed or damaged, it can lead to a rough, jarring experience, detracting from the adventure. Sometimes, the only visible issue is superficial wear, but underneath, the structural integrity of the seat may be compromised. Regular inspection can help identify these problems early on, ensuring your ATV remains a reliable companion.
To assess whether your ATV seat needs reupholstery, consider these key indicators:
- Extensive cracking or peeling of the vinyl surface
- Persistent discomfort or uneven support during rides
- Visible foam deterioration or crumbling padding
Addressing these issues promptly with professional reupholster ATV seat services will restore comfort, durability, and style to your machine. Don’t wait until minor flaws turn into costly repairs—recognising the signs early keeps your ATV in top condition for the adventures ahead.
Types of Seat Material Options – Vinyl, Leather, Neoprene, Custom Fabrics
When embarking on the journey to reupholster ATV seats, the choice of material is paramount to achieving a harmonious blend of durability and aesthetic appeal. Each option offers a unique narrative, transforming your rugged machine into a personalised masterpiece. For those seeking a resilient yet sleek finish, vinyl remains a popular choice. Its waterproof characteristics and ease of maintenance make it ideal for the unpredictable world of off-road adventures.
Alternatively, leather exudes timeless elegance and superior comfort. While it may require more diligent care, leather reupholster atv seat projects elevate the overall look, imparting a sense of luxury that withstands the test of time. Neoprene, with its shock-absorbing properties and resistance to water and grime, is perfect for those who crave practicality without sacrificing style. For a truly bespoke touch, custom fabrics provide endless possibilities, allowing you to craft a seat that embodies your personality and riding ethos.
- Vinyl – durable and weather-resistant, perfect for rugged conditions
- Leather – luxurious and comfortable, ideal for premium reupholster atv seat projects
- Neoprene – versatile, shock-absorbing, and resistant to moisture and dirt
- Custom fabrics – unique, customisable options for personalised style
Choosing the right material ultimately depends on your riding environment and personal preference, but understanding these options helps ensure that your reupholster atv seat will stand out in both performance and appearance. Each material choice tells a story—one of resilience, style, and adventure—waiting to be woven into your next off-road chapter.
Step-by-Step Guide to Reupholstering an ATV Seat
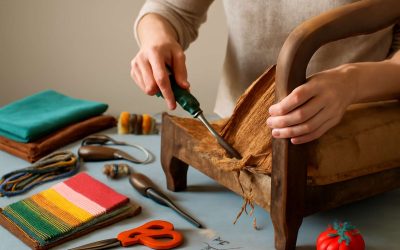
Removing the Old Seat Cover – Tools needed, safety tips, step-by-step removal
Reupholstering an ATV seat might sound intimidating, but it’s surprisingly straightforward—if you know the right steps and tools! According to industry insiders, a well-executed reupholster ATV seat can breathe new life into your ride, making those muddy trail adventures more comfortable and stylish. The first crucial step? Removing the old seat cover without turning it into a shredded mess. Grab a flathead screwdriver, a pair of pliers, and a utility knife—these are your trusty sidekicks for the job.
Before diving in, ensure your workspace is safe. Wear gloves to prevent cuts, and work in a well-ventilated area. To begin, carefully detach the seat from your ATV, then flip it over. Use the screwdriver to gently pry up the staples or clips holding the old cover in place. For stubborn spots, a utility knife can help cut through the fabric or vinyl. Patience is key here—rushing could damage the foam beneath, which defeats the purpose of reupholstering your ATV seat in the first place.
Inspecting and Repairing the Foam – Assessing damage, replacing or adding foam
Reupholstering an ATV seat isn’t just about aesthetics; it’s about preserving comfort and functionality for those rugged adventures. Once the old cover is stripped away, the next critical phase involves inspecting and repairing the foam beneath. This component acts as the backbone of your seat’s comfort, and neglecting its condition can turn a promising reupholster atv seat project into a regrettable ordeal.
Begin by meticulously assessing the foam for signs of wear, cracks, or crumbling. If the foam feels compromised or shows visible damage, it’s wise to replace or augment it. Adding a layer of high-density foam can restore the cushioning, ensuring you don’t sit on a mat of compressed despair. For minor issues, a simple patch or foam adhesive may suffice, but larger repairs call for a full replacement.
To streamline the process, consider using an ordered list:
- Remove the damaged foam carefully, taking care not to puncture or tear the underlying padding.
- Measure the seat base to cut a new foam piece that fits snugly—precision here makes all the difference.
- Secure the new foam with adhesive or staples, ensuring an even distribution of padding across the seat surface.
Remember, in the art of reupholster atv seat, attention to detail during foam inspection and repair can elevate your riding experience from merely tolerable to truly comfortable. After all, a well-cared-for foam layer is the unsung hero of an enjoyable off-road adventure, cushioning every bump and rut with grace and resilience.
Choosing the Right Upholstery Material – Factors to consider, durability, weather resistance
Choosing the right upholstery material is a crucial step in reupholstering an ATV seat, especially when durability and weather resistance are top priorities. Off-road adventures expose your seat to mud, rain, UV rays, and rough terrain, demanding a material that can withstand these elements without deteriorating. The selection process involves weighing factors such as abrasion resistance, ease of cleaning, and aesthetic appeal.
When selecting fabric for your reupholster ATV seat, consider options like vinyl, neoprene, or specialised outdoor fabrics. Each offers unique benefits: vinyl is highly resistant to water and easy to wipe clean, making it popular among avid riders. Neoprene, on the other hand, provides excellent cushioning and grip, ideal for those long, rugged trips.
To streamline your choice, evaluate these key factors:
- Weather resistance: Ensures longevity against rain, UV exposure, and mud.
- Durability: Able to withstand wear and tear from frequent use.
- Ease of maintenance: Simplifies cleaning after muddy rides.
Incorporating the correct upholstery material not only elevates the comfort of your reupholster ATV seat but also guarantees its resilience through countless off-road escapades. Selecting wisely transforms your ATV seat into a rugged yet plush throne that’s ready for anything the trail throws its way!
Measuring and Cutting New Fabric – Accurate measurements, cutting techniques
Reupholstering an ATV seat is akin to restoring a legendary steed—each measurement and cut brings new life and resilience to your trusted companion. Precise measurements are the cornerstone of a flawless reupholster atv seat process, ensuring that the new fabric contours perfectly to the original shape. Begin by removing the seat from your ATV and laying it flat on a stable surface. Using a flexible tape measure, carefully record the length, width, and any contours that define the seat’s unique profile. Remember, accuracy here spells the difference between a snug fit and a sagging nightmare.
Once you’ve gathered your measurements, transfer them onto your chosen fabric—be it weather-resistant vinyl, neoprene, or specialised outdoor materials. When cutting, employ a sharp utility knife or scissors and cut slightly larger than the measurements to allow for seam allowances. This extra margin provides room for adjustments and helps maintain the integrity of the upholstery during fitting. For complex shapes, a pattern can be drafted from the old cover or by tracing the seat onto paper before transferring the shape onto the fabric.
- Utilise a straightedge for straight cuts.
- Round or curved sections should be carefully smoothed out for a seamless fit.
The art of measuring and cutting for a reupholster atv seat requires patience and precision—two virtues that transform a simple task into a craft. With every measured inch and tailored cut, the new fabric promises durability, weather resistance, and a customised aesthetic that elevates your off-road experience to mythical heights!
Attaching the New Cover – Stapling, sewing, securing tips
Attaching the new cover to your ATV seat is where the magic truly happens. After meticulously measuring and cutting your fabric, it’s time to secure it in place. The goal? Achieve a tight, wrinkle-free finish that can withstand the harshest outdoor conditions. Start by aligning the fabric carefully over the seat and smoothing out any creases or bubbles. Once aligned, use a heavy-duty staple gun to affix the fabric to the underside of the seat pan. For a professional look, work from the centre outward, pulling the fabric taut with each staple—think of it as giving your seat a firm hug.
For those who prefer sewing, a strong upholstery needle and weather-resistant thread will do the trick. Sew along the edges of the fabric, ensuring the seams are snug and secure. When dealing with curves or complex contours, employ a combination of staples and hand sewing to maintain flexibility and a seamless appearance. To finish off, fold the excess fabric neatly underneath and staple or sew it down, creating a clean edge that won’t unravel over time.
- Always double-check the tension—no sagging allowed!
- Use high-quality staples or marine-grade fasteners to resist the elements.
- Secure the fabric tightly but avoid over-stretching, which can cause warping or tearing.
With these secure techniques, your reupholster ATV seat will look sharp and stay durable, ready to conquer trails and take on the next adventure with renewed flair. Proper attachment isn’t just about aesthetics—it’s about resilience and comfort, ensuring your off-road ride remains smooth and stylish for miles to come.
Reinstalling the Seat – Final check, reattachment process
Reinstalling your ATV seat after reupholstering might seem like the final hurdle, but it’s actually where your efforts really come to life. This stage requires a steady hand and a keen eye to ensure everything is perfectly aligned. An improperly secured seat can lead to discomfort and even damage, so attention to detail here is crucial.
Start by gently lowering the seat back onto the ATV frame, making sure all mounting points line up seamlessly. Before tightening everything down, double-check the fabric’s tension—there should be no sagging or bunching. For extra security, consider a final pass with a staple gun or some robust fasteners, especially around the edges. If your seat’s contours are complex, take your time to adjust the fabric so it hugs the foam and frame perfectly, avoiding any puckering or loose spots.
To ensure your reupholster ATV seat remains comfortable and durable, perform a final inspection—press lightly to check for loose staples or stitches. If all looks good, reattach the seat carefully to the ATV frame, following the reverse order of removal. Remember, this final check isn’t just about aesthetics; it’s about creating a resilient, long-lasting finish that stands up to rugged off-road adventures.
Ultimately, a proper reinstallation transforms your work of reupholstering into a polished, professional finish. It’s the step that seals the deal—securing your seat’s comfort and durability for every trail, jump, and muddy escapade ahead.
Tools and Materials Needed for ATV Seat Reupholstering
Essential Tools – Staple gun, scissors, screwdrivers, upholstery adhesive
Embarking on a mission to reupholster atv seat transforms a mundane ride into an adventure-filled journey. To achieve a flawless finish, assembling the right tools and materials is essential—think of it as gathering your arsenal for a creative conquest. The cornerstone of this process is a sturdy staple gun, which ensures the new upholstery stays firmly in place, even through rugged terrains. Alongside, a pair of sharp scissors helps in trimming fabric with precision, while screwdrivers are necessary for removing and reattaching the seat components seamlessly.
When selecting materials, weather resistance and durability are paramount. Options like vinyl, leather, neoprene, or custom fabrics offer various textures and resilience levels, perfect for enduring the elements. To facilitate a smooth workflow, some enthusiasts prefer to organise their supplies in a simple list:
- Staple gun
- Heavy-duty scissors
- Phillips and flat-head screwdrivers
- Upholstery adhesive
- Measuring tape
With these essentials, reupholstering an atv seat becomes less daunting and more of an enjoyable craft—turning your ATV into a personalised masterpiece that promises comfort and style on every ride.
Recommended Materials – High-quality vinyl or leather, foam padding, fabric cleaner
Reupholstering an ATV seat transforms your rugged ride into a personalised machine, blending durability with style. The choice of high-quality materials is crucial to ensure longevity and resistance against the elements. Premium options like weather-resistant vinyl or genuine leather not only elevate the aesthetic appeal but also withstand tough outdoor conditions. Foam padding is equally vital, providing the cushioning needed for comfort during long adventures. For a cleaner finish and easier installation, a fabric cleaner becomes an invaluable tool, removing dirt and grease from old surfaces before new materials are applied.
When selecting materials for reupholstering your ATV seat, consider factors such as weather resistance, abrasion strength, and ease of maintenance. An unordered list of recommended materials highlights the essentials:
- High-quality vinyl or leather
- Foam padding for cushioning
- Durable, weather-resistant fabric
- Fabric cleaner for prep work
These materials, combined with the right tools, turn the reupholster atv seat project into a rewarding craftsmanship that ensures comfort and style stay intact, mile after mile. The process demands meticulous attention to detail, but with the proper selection of high-grade materials, your ATV seat will look and feel brand new, ready to conquer any terrain with confidence.
Optional Accessories – Seat grips, decorative stitching, waterproof additives
Reupholstering an ATV seat isn’t just about aesthetics; it’s a delicate dance of craftsmanship and resilience. To achieve that perfect balance, the right tools and materials are essential. A high-quality staple gun, sharp scissors, and a reliable screwdriver set form the backbone of any successful reupholster atv seat project. These tools ensure precision, whether you’re securing new fabric or removing old covers with finesse. For added adhesion and durability, an upholstery adhesive can be a game-changer, sealing away wear and tear.
Optional accessories can elevate your reupholster atv seat from functional to extraordinary. Consider adding seat grips for better handling, decorative stitching to personalise your ride, or waterproof additives to enhance weather resistance. These enhancements not only extend the lifespan of your seat but also transform it into a statement of individuality amidst rugged terrains.
- High-quality vinyl or leather for durability and style
- Foam padding to cushion every mile
- Weather-resistant fabrics to withstand the elements
- Fabric cleaner for prepping surfaces before reupholstering
When selecting materials, keep in mind the importance of weather resistance and abrasion strength. Combined with the right tools and optional accessories, reupholstering your ATV seat becomes a gratifying pursuit — a union of artistry and resilience that ensures your ride remains comfortable and captivating, mile after mile.
Tips and Tricks for a Professional Finish
Preparing the Workspace – Clean, well-lit area, organized tools
Creating a professional finish when reupholstering an ATV seat starts with preparing the workspace properly. A clean, well-lit area is essential; it not only makes the job easier but also ensures safety and precision. Clear away clutter and organise your tools beforehand to avoid interruptions during the process.
A tidy workspace allows you to focus on intricate details, such as measuring and cutting new fabric accurately. Consider laying down a protective covering to prevent accidental damage to surrounding surfaces. Good lighting is crucial—natural light if possible, supplemented by adjustable lamps to eliminate shadows and reveal every detail clearly.
For optimal results, keep your tools—such as staple guns, scissors, and upholstery adhesive—within easy reach. This eliminates unnecessary movement and keeps workflow smooth. Remember, a well-prepared workspace isn’t just about aesthetics; it directly impacts the quality of your reupholster atv seat project, leading to a more professional, durable finish.
Ensuring Accurate Measurements – Double-checking dimensions, templates
Ensuring an immaculate finish when you reupholster ATV seat hinges on precision — the kind that turns a simple task into a work of art. One pivotal tip is to double-check all measurements twice before cutting, for a misstep here can ripple into an uneven, unprofessional look. Using templates made from sturdy cardboard or paper not only guarantees accuracy but also saves time and reduces material waste.
Remember, meticulous measurement is the foundation of a flawless finish. When you’re ready to cut, employ sharp scissors or a utility knife, and follow your template’s contours with care. It’s tempting to rush, but patience here pays dividends — a perfectly cut fabric or vinyl ensures a sleek, tight fit. For ultimate precision, consider marking your measurements directly onto the fabric with tailor’s chalk or a fabric marker, then cut with deliberate, steady motions. These small details can elevate your reupholster ATV seat project from amateur to artisan!
Creating Seamstitches for Durability – Reinforced stitching, pattern alignment
Achieving a professional finish when you reupholster ATV seat hinges on meticulous seamstitching that balances durability with aesthetic appeal. Reinforced stitching, such as double or triple-stitched seams, creates a resilient barrier against the rigours of off-road adventures, ensuring your seat withstands the test of time. Pattern alignment is equally vital; precise matching of fabric or vinyl patterns guarantees a seamless, polished appearance that elevates your project from ordinary to extraordinary.
To elevate your craftsmanship, consider employing a few key tricks: begin with a high-quality sewing machine capable of handling heavy upholstery materials. Use a strong, upholstery-grade thread—preferably polyester—for enhanced strength. When sewing, opt for a consistent stitch length to avoid puckering or weak points. For extra reinforcement, especially in stress-prone areas, add bar tacks or backstitching. These small but impactful techniques weave longevity into your reupholster ATV seat project, transforming it into a durable masterpiece that rides as beautifully as it looks.
- Align pattern edges meticulously before sewing
- Reinforce seams at stress points with double stitching
- Use a specialised upholstery needle for thick materials
Remember, the secret to a flawless finish lies not only in the materials but also in the patience you invest in each stitch. When done right, your reupholstered ATV seat will be a testament to craftsmanship—resilient, refined, and ready for the adventures ahead.
Maintaining Your Reupholstered Seat – Regular cleaning, weatherproofing
Maintaining your reupholstered ATV seat is essential to keep it looking pristine and performing at its best. Regular cleaning not only preserves the vibrancy of your chosen materials but also prevents grime and debris from causing premature wear. Use a gentle, upholstery-safe cleaner to wipe down the surface after every few rides—this simple step can significantly extend the lifespan of your seat fabric or vinyl.
Weatherproofing is another crucial aspect. Applying a specialised waterproofing spray designed for outdoor upholstery creates a resilient barrier against rain, mud, and UV rays. This extra layer of protection ensures your reupholster ATV seat remains resistant to the elements, even during unexpected downpours or prolonged exposure to sunlight.
To keep your seat in top shape, consider incorporating a few smart accessories: seat covers, waterproof additives, or even decorative stitching. These enhancements not only add style but also provide an extra shield against harsh conditions. When combined with consistent maintenance, your ATV seat will stay durable and comfortable, ready for countless adventures across rugged terrains.
DIY vs Professional Reupholstering: Which Is Right for You?
Pros and Cons of DIY Reupholstering – Cost savings, personalization, skill requirements
Reupholstering your ATV seat isn’t just a matter of aesthetics—it’s a bold statement about your riding style and a savvy way to extend the life of your gear. But when it comes to reupholster ATV seat projects, you’re faced with a choice: DIY or hire a professional? According to industry surveys, nearly 60% of outdoor enthusiasts consider tackling upholstery themselves to save cash. The question is, does DIY really hold up against professional reupholstering?
Doing it yourself can be a rewarding experience, especially if you’re handy with a staple gun and have patience to match. The biggest perk? Cost savings. You’ll avoid labour fees and only pay for materials like high-quality vinyl or neoprene, which are essential for weather-resistant durability. Plus, personalisation is a breeze—you can choose colours, patterns, and even add some custom stitching for that bespoke touch. However, it’s not all sunshine and rainbows; DIY reupholster atv seat projects require a certain skill set. Poorly fitted covers or uneven seams can turn your once comfy seat into a chafing nightmare—definitely not what you want after a long day on the trails.
When to Consider Hiring a Professional – Complex damage, time constraints, desired quality
When it comes to reupholster ATV seat projects, the question isn’t just about aesthetics — it’s about whether you’re brave enough to take on the challenge yourself or wise enough to call in a professional. DIY enthusiasts revel in the idea of transforming their ATV seats, thinking, “How hard can it be?” but industry surveys reveal nearly 60% of outdoor adventurers prefer to reupholster ATV seats themselves to save a few quid. The truth is, while a DIY reupholster ATV seat can be a rewarding badge of honour, it’s not always the best choice for every situation.
If your ATV seat has suffered complex damage—think torn foam deep into the padding or cracked vinyl that looks more like a design feature than wear—professional reupholstering is probably your best bet. Skilled upholsterers bring precision and experience that a weekend warrior might lack. For those pressed for time or craving a high-end finish, a professional touch ensures your reupholster ATV seat will look pristine and last through many muddy adventures. Remember, some projects demand more than just a staple gun and a bit of patience; they require an expert eye and refined craftsmanship.
Consider your own skills and the scope of damage before diving in. If you’re contemplating a DIY reupholster ATV seat, ask yourself:
- Is the damage purely cosmetic or structural?
- Do I have the right tools and materials at hand?
- Am I prepared for the potential mess and time investment?
For more complex issues, or if you desire a flawless finish, it’s wise to consider hiring a professional upholsterer. After all, a seat that looks good but isn’t properly fitted can turn a fun ride into an uncomfortable ordeal. Sometimes, leaving the reupholster ATV seat project in the hands of an expert ensures durability, weather resistance, and comfort—without turning your weekend project into a long-term frustration.
Finding a Reupholstery Expert – How to choose reputable services, reviews, portfolios
Embarking on the journey to reupholster ATV seats is akin to stepping into a realm where craftsmanship and passion intertwine. A startling 60% of outdoor enthusiasts believe that reupholstering their ATV seats themselves is the most rewarding way to breathe new life into their rugged companions. Yet, beneath the allure of DIY lies a delicate balance—one that hinges on skill, scope of damage, and the desired finish. Choosing between a DIY reupholster ATV seat and enlisting a professional is not merely a matter of convenience but a decision rooted in understanding the true complexity of your project.
For those with a spark of ingenuity and a modest toolkit, a DIY approach offers the thrill of personal achievement. However, if your ATV seat bears deep tears, cracked vinyl, or compromised foam, the terrain becomes far more treacherous. In such cases, a seasoned upholsterer’s expertise is invaluable, ensuring the reupholstered ATV seat withstands mud, rain, and relentless adventure. When evaluating your own skills, consider whether you possess the right tools, such as staple guns and upholstery adhesives, or if the damage demands a more refined touch.
Finding a reputable reupholstery expert begins with diligent research. Reviews and portfolios serve as vital windows into their craftsmanship, revealing the quality of their work and their attention to detail. Seek out artisans who specialise in reupholster ATV seats and who demonstrate a history of durable, weather-resistant finishes. An ordered approach—perhaps a brief list—can aid in this quest:
- Review customer testimonials for consistency and satisfaction
- Examine portfolios showcasing diverse reupholster atv seat projects
- Verify their experience with specific materials, such as vinyl or leather
Ultimately, choosing a skilled upholsterer is about matching their expertise with your vision and the specific needs of your ATV seat. In a world where every ride is a mythic quest, never underestimate the value of a well-crafted, resilient seat—crafted either by your own hand or a trusted artisan. The key lies in recognising when the challenge exceeds your capabilities and when to entrust the craft to a seasoned professional. After all, a seat that fits perfectly and endures the elements transforms every muddy trail into a legend worth retelling.
Cost Factors and Budgeting for ATV Seat Reupholstery
Estimated Costs – DIY materials, professional service fees
When considering the costs associated with reupholster atv seat projects, it’s easy to feel like you’re embarking on a financial rollercoaster—minus the safety harness. DIY materials can be surprisingly budget-friendly, often costing less than a couple of hundred pounds for high-quality fabric, foam padding, and essential tools. However, don’t forget that the thrill of saving money might come with a learning curve and a few extra hours of your life you’ll never get back.
On the other hand, opting for a professional service might seem like a splurge, but it guarantees a polished finish and peace of mind. Professional fees for reupholster atv seat services vary depending on the complexity and the material chosen. Expect to pay anywhere from £100 to over £300 for a custom job. Remember, choosing the right upholstery material—whether vinyl, leather, or neoprene—can significantly influence the final cost, especially if weather resistance and durability are high on your list. Balancing your budget with the desired quality is key to ensuring your ATV seat looks great and performs well for many rides to come.
Price Range for Different Materials – Vinyl, leather, custom fabrics
When contemplating the art of reupholster atv seat, understanding the intricate dance of cost factors becomes paramount. Each choice in material—vinyl, leather, or custom fabrics—paints a different financial landscape, shaping the final price with its unique character. The budget for this craft can fluctuate dramatically, from modest DIY efforts to opulent professional craftsmanship. Weather-resistant materials like neoprene and high-grade leather tend to command a premium, reflecting their durability and resilience against the elements.
For those seeking a cost-effective yet durable solution, vinyl often presents a compelling compromise—affordable, easy to maintain, and available in a spectrum of colours. Leather, whispered as the epitome of luxury, elevates your ATV’s aesthetic but can push the price beyond the £300 mark, especially when factoring in custom stitching or specialised treatments. Custom fabrics, tailored for specific needs or artistic flair, offer a personalised touch but may carry additional costs depending on fabric rarity and design complexity.
- Assess the extent of wear—damaged foam, cracked coverings, or structural issues can influence the scope of reupholstering.
- Balance your aesthetic desires with the durability required for rugged outdoor adventures.
- Factor in the labour involved—whether you’re wielding a staple gun and scissors or engaging a seasoned upholsterer.
Ultimately, the price range for reupholster atv seat projects is a reflection of your priorities—be it wallet-friendly practicality or the pursuit of bespoke elegance. Each material weaves its own story into the fabric of your vehicle’s persona, transforming a worn-out seat into a throne of comfort and style, ready to withstand many a daring ride. The harmonious blend of cost and quality ensures that your ATV’s seat remains a steadfast companion on every adventure, echoing the spirit of resilience that defines the great outdoors.
Additional Expenses – Foam replacement, hardware, shipping
When reupholstering an ATV seat, understanding the full scope of potential expenses can save you from unexpected costs. Beyond the basic fabric or leather, several additional factors influence the final budget. Foam replacement, for example, is often necessary if the existing padding is worn out or damaged, adding to the overall cost. High-quality foam ensures comfort and longevity, but it can push the price upwards.
Hardware components such as new staples, clips, or mounting brackets should also be factored in. Shipping fees for materials or tools—especially if ordering specialised fabrics or custom accessories—can further inflate the budget. For those opting for a professional reupholster atv seat, labour costs are a significant consideration, often reflecting the complexity of the job and the quality of craftsmanship.
- Assess the scope of damage or wear before purchasing materials.
- Include costs for foam, hardware, and shipping when planning your budget.
- Factor in optional extras like seat grips or waterproof additives that can enhance durability and comfort.
Balancing these additional expenses with your desired outcome will ensure your ATV seat not only looks sharp but also withstands the rigours of outdoor adventures. Whether tackling DIY reupholstering or hiring a professional, awareness of these cost factors helps create a more accurate estimate and a successful project.


0 Comments