Tools and Materials Needed
Essential Tools for the Job
Starting a reupholster headboard with buttons project without the correct tools wastes time and creates frustration. You need a staple remover, a pneumatic stapler, and a drill for the button holes. Staples must be long enough to grab the wood frame securely.
For the tufting process, gather curved needles, waxed thread, and a buttoning kit. A pair of needle-nose pliers makes pulling the twine taut a straightforward action.
- Curved upholstery needle
- Button twine
- Needle-nose pliers
Each tool has a specific role. Skipping one can lengthen the entire job by hours.
Choosing the Right Fabric
Choosing the right fabric for a reupholster headboard with buttons is more than picking a color. The weave must endure the constant pull of tufting thread without distorting. Linen blends can fray around the button shank, while a tight cotton twill holds its shape. Velvet feels luxurious but shows every finger mark, so a matte texture is safer for high traffic rooms.
Pattern placement matters as much as durability. A bold geometric print requires exact alignment at each button depression. I have seen beautiful fabric ruined by a half inch shift. A busy pattern hides minor mistakes, but a solid fabric exposes every lump in the foam.
Consider these reliable choices:
- Cotton duck, firm and forgiving
- Polyester velvet, plush with good recovery
- Wool blend, breathable and naturally resilient
The local climate shapes your decision too. Coastal humidity in places like Durban calls for mould resistant backings. The fabric should fold cleanly around the button and hold its form after years of use!
Selecting Button Kits and Foam Padding
A button kit costs less than R150 at most South African suppliers, yet it decides whether your headboard looks bespoke or homemade. The shank length matters most. A shank too short disappears into the foam. A shank too long throws shadows. For a reupholster headboard with buttons, choose a 5mm to 8mm shank.
Foam must support the button’s pull without collapsing. High density polyurethane at 32kg per cubic metre holds its shape. Softer foam feels comfortable but caves around each button within months. Keep 20mm of foam beneath the button and pair it with a firm plywood base.
Gather these supplies:
- Button kits with matched fabric covers
- High density foam cut 25mm thicker than the original
- Wadding to smooth the curve between foam and fabric
In Durban’s humidity, choose nickel plated button backs to resist rust. I have seen fine work ruined by cheap backs within a season.
Measuring and Cutting Supplies
Measuring and cutting supplies set the geometry for the whole project. Begin at the centre point, not the edges, since edge measurements amplify errors in a warped frame. When you reupholster headboard with buttons, use a disappearing fabric marker, a steel ruler, and a rotary cutter with a fresh blade. A dull blade drags the wadding.
Cutting foam requires a serrated bread knife or an electric carving knife. A utility knife compresses high density foam, leaving a bevel. Trace the plywood base onto the foam, then cut 25mm larger on each side. The wadding needs a 50mm allowance to wrap the board.
For marking positions on a reupholster headboard with buttons, I rely on a long metal ruler and a carpenter’s square. The grid must account for the fabric pattern repeat, which shifts the visual centre. A chalk line helps on dark velvet, a quilting ruler on lighter linen.
Preparing the Headboard for Reupholstery
Removing the Old Fabric Carefully
The first step to reupholster headboard with buttons is often the most delicate. Old fabric hides years of dust and tension, and pulling it away recklessly can damage the wood beneath. Work slowly, using a seam ripper to detach trim and a pair of pliers to extract stubborn staples. As you peel back layers, note the original button placement before removing each tuft, because those positions become your map for reinstalling new buttons later.
After the fabric lifts free, inspect the foam and batting. Crumbled padding should be scraped off with a putty knife, but intact layers deserve preservation. Check for rusted nails or splinters along the frame. A clean, smooth base will prevent future bulges and uneven pressure points. When you finally reupholster headboard with buttons, this careful preparation ensures every fold and pleat sits exactly as intended, saving you from redoing the entire task.
Extracting Existing Buttons and Tufting Layers
A single button carries the weight of an entire tufted pattern. It pulls through foam, batting, fabric, and board. When you reupholster headboard with buttons, the anchor points matter most. Once the old fabric is gone, flip the headboard. Anchors sit on the back, secured by twine or staples. Snip the twine with flush cutters. Pry staples with a flat screwdriver. Never yank buttons from the front. That tears foam and widens holes. Work from the back, always!
Extract every button before touching the tufting layers. The foam and batting relax and lift away from the board, often free of adhesive. Check each layer for damage:
- Cracked foam loses shape around the button wells.
- Flattened batting creates uneven depth under new fabric.
- Misaligned holes pull buttons crooked.
Brush the board clean before you reupholster headboard with buttons. Debris under fresh layers turns into lumps. Take it from me, aligned and intact layers win.
Inspecting and Repairing the Wooden Frame
The board itself now stands bare, and its condition dictates everything that follows. A warped or splintered frame will sabotage even the finest fabric, so inspect the wood with a critical eye before you reupholster headboard with buttons. Run your fingers along the edges. Look for cracks where the staple gun previously dug in, and check the centre support for bowing.
– Test every joint for movement; a wobbly frame amplifies under tension.
– Fill deep gouges with wood filler, then sand flush once dry.
– Tighten loose corner brackets with a screwdriver, not a drill, to avoid stripping.
Reinforce any weak points now. The finished weight of foam, batting, and upholstery is substantial, and the frame must hold firm for years, not months. A solid base means your button anchor points will seat correctly, and that stability is what separates a professional result from a sagging disappointment.
Cleaning and Sanding the Surface
A bare frame that has passed inspection still carries years of history. Dust, grease, and old adhesive residues cling to every surface, and these contaminants will compromise the bond between your new layers and the wood. Before anything else, give the entire structure a thorough wipe down using a tack cloth or a lint-free rag dampened with a mild detergent solution. Pay particular attention to the top edge and corners, where skin oils and dust accumulate most stubbornly.
Once the frame is clean and dry, sanding becomes your final act of preparation. Use a medium grit paper, around 120, to smooth any rough patches left from the old staple extraction. This step matters for the tufting process: snags in the wood can tear your new fabric during the pull and fold stages. Work with the grain of the timber, and finish with a fine grit to achieve a uniformly smooth surface.
– Clean all surfaces with a tack cloth to remove every trace of dust.
– Sand the frame edges and faces with 120 grit paper, then finish with 220 grit for a silky smooth base.Always wipe the frame down once more after sanding. This final pass ensures no wood dust interferes with the adhesive you will apply when you reupholster headboard with buttons. A clean, smooth foundation allows the foam and fabric to sit flush, which is the real secret to crisp, even button tufts.
Step-by-Step Reupholstery Process
Laying Out the New Fabric and Foam
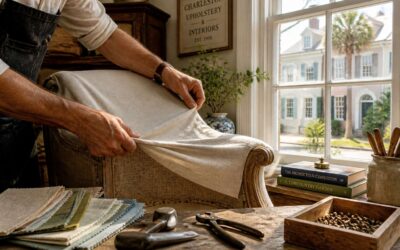
There is a quiet satisfaction in unrolling a fresh length of fabric, especially after wrestling with decades of dust and stubborn tacks. When you set out to reupholster headboard with buttons, this precise stage rewards a steady hand. I always lay the new foam on a flat, clean surface, then centre the wooden frame over it, allowing a generous overhang of roughly five centimetres on each side.
Drape the fabric over the foam, letting it settle naturally without stretching. Before you cut, check the pattern alignment from the foot of the bed. A simple checklist keeps things orderly:
- Foam seams sit offset from any fabric seams.
- The pattern runs vertically, not crookedly.
- Pre-marked button points line up with the foam’s tufting guides.
Trim with a sharp blade, leaving ample margin for wrapping and stapling. Your efforts to reupholster headboard with buttons will hold fast when the fabric is laid true from the start.
Securing the Base Layer with Staples
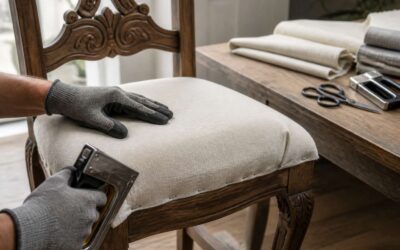
The staple gun becomes an extension of the hand in this stage. I work from the centre outward, pulling the fabric taut across the foam’s curve, each staple a small anchor against the inevitable sag of time. When you reupholster headboard with buttons, the base layer’s tension determines everything that follows. A loose corner here will betray you later as a ripple beneath the button tufts.
I press the fabric with one hand, fire the staple with the other, and check the alignment after every few fastenings. The sequence matters:
– Staple the top edge first, then the bottom.
– Move to the sides, keeping the pattern straight.
– Leave the corners for last, folding them flat.
The staples should sit flush, not buried too deep, not proud. This is the quiet conversation between fabric and frame that no one sees but everyone feels when they lean against the headboard.
Creating Tufts and Folds for Button Placement
With the base layer anchored, the button positions become the next landmarks. I mark each point on the foam with a long needle or chalk, measuring so the grid stays true. Pressing the fabric inward at each marked spot creates a small depression that will hold the button once threaded through.
I work in a deliberate order, usually from the centre outward. This keeps the folds even and prevents the fabric from shifting as tension builds. When I reupholster headboard with buttons, the depth of each fold matters. Too shallow and the button looks lost. Too deep and the foam compresses unevenly.
I use my fingers to push the fabric down around each button point, smoothing the pleats so they fall in one direction. Consistency here is everything! A few minutes adjusting each fold saves hours of frustration later. To reupholster headboard with buttons, each tuft aligns with its neighbour.
Marking Button Positions Accurately
Precision in marking button positions is the essential first step to a flawless headboard. When you reupholster headboard with buttons, the grid you create determines every fold and tension line. A single misaligned point becomes a visible flaw, a shadow that draws the eye.
I start by mapping the centre of the panel, then work outward in measured increments. Using a flexible tape measure and a chalk pencil, I mark each intersection on the foam. The grid must be square. I check diagonals to ensure symmetry.
- Mark the centre point first.
- Measure equal distances horizontally and vertically.
- Verify each point with a straight edge.
This ritual feels almost architectural. The accuracy of the marks dictates the final shape. Without this care, the unevenness will haunt the finished piece.
Stuffing and Padding for a Plush Finish
The true luxury of a tufted headboard lives in its depth, not its surface. When I reupholster headboard with buttons, the padding stage is where that depth is born. I layer a high-density foam core, then a soft polyester batting wrap. The batting softens the hard edges of the foam and prevents the fabric from wearing thin. I staple the base foam taut to the frame, but leave the batting slightly loose. This plush finish requires a specific sequence:
- Secure the primary foam slab with a few temporary staples.
- Drape the batting over it, allowing a two inch overhang.
- Trim the corners with a curve to avoid bulk.
A final layer of cotton felt adds a whisper of resilience. This careful plumping ensures the button folds sink into a welcoming surface, so the tufting does not fight the stuffing.
Stapling the Edges and Corners
Once the padding is settled, the real test begins at the perimeter. I pull the fabric over the edge with steady, even pressure, then fire a staple into the centre of each side. This anchors the weave without distorting the tufting pattern. For the corners, I use a soft pleat instead of a tight fold. That pleat distributes the bulk evenly and prevents an ugly lump beneath the piping.
The sequence matters when you reupholster headboard with buttons. I work from the middle toward each corner, checking the grain for skew every few staples. A spring-loaded staple gun makes all the difference here. My process looks like this:
- Staple the top edge first, then the bottom.
- Leave the corners unstapled until both sides are tensioned.
- Trim any excess batting that peeks out before the final fold.
Finally, I tap the staples flush with a flathead screwdriver. This keeps the frame flush against the wall and leaves the fabric crisp.
Covering and Attaching Buttons
Cutting Fabric Circles for Button Covers
Cutting fabric circles for button covers demands a steady hand and a sharp eye. For a headboard with deep tufting, each button must match its neighbor precisely, otherwise the entire pattern loses its rhythm.
I prefer to trace the template from the button kit onto the fabric, then cut slightly oversized. This allowance lets the fabric gather smoothly around the dome without puckering.
Here is the sequence:
1. Place the fabric wrong side up.
2. Center the button cover and trace.
3. Cut a circle about twice the diameter.
4. Press the fabric into the mold.
After cutting, attach the covers using the plunger tool. The result should sit flush, ready for the next step in your project to reupholster headboard with buttons. Take your time, because a misaligned button cover will haunt every later stage.
Snapping and Pressing the Button Kits
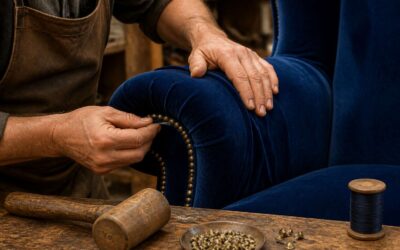
The button kit waits on your worktable. Each dome receives its fabric shroud, and you press, feeling the mechanism engage. The snap is clean and definite. When the fabric sits properly, the button emerges complete, its edges neat and its face smooth.
I press each one with deliberate force, checking that the backing grips firmly. A loose button will betray you later, popping free when you pull the tufting tight. I inspect each finished button:
- Press fully until the snap registers
- Check the rim for fabric bunching
- Set aside any button that feels loose
The covered buttons wait beside your headboard. When you reupholster headboard with buttons, each one anchors a fold and holds the cushioning in place. This step is quiet but essential. The preparation you do now shows in every tuft and every finished edge.
Threading Upholstery Needle and Twine
With the buttons covered, I turn to the upholstery needle and twine. A curved needle glides through foam and fabric with less resistance. I thread the twine through the eye, double it over, and tie a knot larger than the button’s shank opening. A small knot will slip right through.
I push the needle from the back of the headboard through each marked position. When you reupholster headboard with buttons, the twine carries the tension that creates the tuft. A weak thread snaps under pressure.
- Use waxed twine for durability
- Keep the needle perpendicular to the surface
- Pull slowly to avoid tearing the fabric
The needle emerges, and I guide the button onto the shank. One firm pull settles it into the fold.
Pulling Buttons Through the Headboard
Every button must pull the fabric with equal force. When you reupholster headboard with buttons, the tension between each tuft defines the entire look. I press the button onto the shank, then pull the twine from the back with steady pressure.
The first pull sets the depth. The second pull locks it. Pull too hard and the foam compresses unevenly. Pull too little and the button floats above the surface. I check each tuft by sight and touch, adjusting as I go.
- Pull until the button sinks just below the fabric line
- Check the fold around the shank for wrinkles
- Staple the twine to the frame before cutting
Once the twine is stapled, I move to the next marked position. Repeating this process across the headboard gives a clean, uniform tufted finish. A loose button stands out immediately, so I tighten every one before moving on. That patience makes reupholstering a headboard with buttons look professional.
Tying Off and Securing the Twine
The moment you reupholster headboard with buttons, the process shifts from broad strokes to fine details. Snapping the metal cap over the fabric covered disc is a small ritual. You must listen for that click, but the fabric always tries to escape the grip. A gentle wiggle sets it straight. Then the button sits on its shank, ready for the needle and twine. This is where patience pays off, because a crooked cover will haunt you every time you look at the bed.
Securing the twine is the final act of trust. After pulling the button to the correct depth, you tie a surgeon’s knot and pull it tight against the frame. Then the staple goes in, angled so it bites wood, not air.
Tying off is a test of nerve. The knot must hold for years, not just until the next bounce. I have seen knots slip an hour after finishing, and the button pops free like a champagne cork. That is a sad day.
- Use a double knot and pull the twine at a 45 degree angle
- Staple horizontally across the knot, then add a second staple vertically
- Leave the tails long enough to check tension without cutting them short
The knot is the seam between your effort and the finished piece. Every time you reupholster headboard with buttons, the memory of a loose button stays with you. So make the knot your obsession. Snip the twine close to the staple bed and press the fabric over the raw edge. Then move along the grid, trusting the process. A headboard with solid tufts feels firm, and the buttons sit like small sentinels guarding your sleep.
Evening out Tufting Depth
When you reupholster headboard with buttons, the covering step is where fabric reveals its personality. A cover that resists the metal cap will cause trouble. Press it evenly, feel the edges tuck under, then snap the cap with authority. The button should sit flat, not tilted.
Evening out tufting depth takes a calm eye. Each button must sink to the same level, otherwise the diamond pattern wobbles. Check from the side, not straight on.
- A straight edge across the buttons reveals any outlier
- Stubborn buttons respond to a tighter pull on the twine
- Overly deep buttons need a release and reset
This rhythm of tug and release settles the grid. When the depth matches across the whole headboard, the tufting feels firm and even, as if the buttons settled themselves.
Troubleshooting and Maintenance Tips
Avoiding Common Fabric Bunching Issues
Reupholstering a headboard with buttons can feel like coaxing order from a stubborn pile of fabric. The fabric bunching happens when the foam and the textile refuse to cooperate, their layers shifting like sand underfoot. Before you even reach for the staple gun, check the weave’s bias, the diagonal stretch that often causes the trouble. A cotton sateen with a heavy nap will behave differently than a sleek linen.
The most common culprits are these:
– Uneven tension in the twine when you pull the buttons through.
– A loose foam base that shifts as you work across the row.
– Staple placement that leaves small, unreleased folds at the curve.
When you reupholster headboard with buttons, the key is to ease the fabric, not pull it. I find that pressing a palm flat against the tuft before securing the twine allows the material to settle without creating those small pillows of excess. Work from the centre out, and give each button a gentle tug, not a hard jerk. That single motion clears most wrinkles before they set.
Fixing Loose Buttons and Sagging Tufts
A button that shifts under pressure is the first warning sign. From my experience, the issue is rarely the button, it is the twine or the foam underneath. Press down on the tuft; if it springs back, the tension is fine. If it stays flat, you need to act.
Reach behind the board and pull the twine to remove the slack. Tie a new knot against the frame. For a stubborn spin, add a small washer before the knot. This fix takes two minutes and prevents the need to reupholster headboard with buttons again. For sagging tufts that reappear within a month, the foam has collapsed.
- Inspect twine knots seasonally.
- Exchange crushed foam with fresh padding.
Use a dab of upholstery glue on the knot once the button lines up. This holds against daily leaning, where most tufting damage begins.
Protecting the Finished Headboard
In my experience, the finished headboard reveals its character in the first weeks. The fabric settles, the buttons find their rhythm, and the tufts soften into place. Yet this is when most damage begins. Daily pressure from pillows and natural hair oils work against the upholstery. Rotate pillows to prevent permanent indentations. Vacuum monthly with a soft brush to clear dust between button folds!
Placement matters. Direct afternoon sun fades fabric unevenly and dries the twine holding each button. A fabric protector spray, tested on a hidden corner first, adds defense against spills. Reapply every six months.
A few habits preserve the craftsmanship:
- Clean spills immediately with a dry cloth, pressing rather than rubbing.
- Inspect the staple line along the bottom edge for lifting.
- Keep heavy objects off the tufted surface.
These small acts delay the need to reupholster headboard with buttons again. When that day comes, the underlying frame will remain sound. That is the quiet reward of attentive care.
Cleaning and Care Recommendations
Some wear is inevitable, no matter how careful you are. The fabric will soften where your shoulders rest, and the tufts will lose their crisp outline. This is the natural life of a reupholstered headboard with buttons. Recognizing the difference between aging and damage is the first step in proper upkeep.
Pilling appears on the surface where friction occurs. Use a fabric shaver on a low setting to remove these small balls of fiber without pulling the weave. If you notice the fabric distorting around the button placements, it means the twine tension has changed. You can address this by reaching the back panel and adjusting the tautness of individual ties, but only if you have access to the original fastening points. Check the back of the headboard for any exposed staples that may have worked themselves loose from the frame.
- Vacuum the fabric using a brush attachment, working in vertical strokes followed by horizontal ones.
- Treat stains with a solution of warm water and a drop of dish soap, testing on an inconspicuous spot first.
- Brush the pile in a single direction after cleaning to restore the nap.
Moisture is a persistent problem in coastal regions. High humidity can cause the foam padding to retain dampness, which leads to mildew along the seam lines. Place a dehumidifier in the bedroom during the rainy months, and keep the headboard a few centimeters away from the wall to allow air circulation. The area behind the buttons, where multiple fabric layers meet, is particularly vulnerable because moisture becomes trapped between the covering and the stuffing.
For stubborn marks on the tufted areas, use a steam cleaner with a narrow nozzle. Steam lifts dirt particles from the fabric folds without soaking the foam beneath. After steaming, leave the headboard to dry completely before placing pillows against it. This prevents the twine from stretching while damp. If any button covers have become scratched or discolored, order a matching replacement kit rather than reusing damaged pieces. A single mismatched button stands out against the uniform tufting.
The most common issue South African households report is dust accumulation in the deep crevices of the button folds. A soft paintbrush works better than a vacuum attachment for these tight spaces. Gently sweep the brush around each button in a circular motion to dislodge the particles. This simple routine, performed every two weeks, keeps the tufting looking sharp and prevents the fabric fibers from matting down permanently. A headboard that receives this level of attention will carry its beauty for years, and the eventual decision to reupholster headboard with buttons again will come from preference, not necessity.

0 Comments