Assessing Your Recliner Before Starting
Checking the Frame and Mechanism
Before you reupholster recliner chair, check the frame for structural integrity. A loose joint here means your new fabric will sag within weeks. Press on the arms and backrest with deliberate force. Listen for creaks that reveal fatigue, then inspect the joinery for split wood or missing dowels.
Next, turn your attention to the mechanism. Operate the recliner through its full range of motion, from upright to fully laid back. The tension should be even, without jerky stops. Check the springs for rust or gaps, and examine the metal tracks for burred edges. A failing mechanism cannot be cured by fabric alone, so if you plan to reupholster recliner chair, be honest about what you uncover.
During this inspection, focus on these trouble spots:
- Corroded rivets on the footrest hinge
- Worn bushings in the swivel base
- Fractured leaf springs under the seat
Evaluating Fabric Wear and Tear
The fabric of a recliner keeps its own counsel, and its secrets are written in the topography of its wear. Before you commit to the considerable undertaking to reupholster recliner chair, you must learn to read that silent language. The arms are the first confessors, their surfaces polished by years of palms and restless fingers. That sheen is not a stain, but a physical breakdown of the weave itself, a loss of fibre strength that no amount of cleaning can revive.
You must also consider the creases. Deep, permanent folds that refuse to spring back are the memory of the foam beneath, now spent and compacted. When you reupholster recliner chair, you are not merely reskinning it; you are giving it a new body. The old skin reveals the state of that body. Press your thumb into the seat cushion and observe the rebound. A slow, reluctant return signals a core that has given up its resilience.
Look for the specific signs of life lived in that chair:
– Frayed threads along the seams, which are the first threads to weaken under daily tension.
– Faded patches on the headrest, caused by prolonged exposure to sunlight and skin oils.
– Loose tufting or buttons that rattle, indicating the underlying batting has shifted.
– A general thinning of the material where your body makes the most contact.
These quiet deteriorations matter because they dictate the budget and labour of your project. If the substrate is rotted, your new upholstery will simply fall on old bones. The true cost of your desire to reupholster recliner chair becomes clear only when you understand that the textile you see is just the surface story of the comfort you feel.
Deciding Between Upholstery or Replacement
Some chairs announce their fate. Others leave you standing in the showroom, comparing prices and wondering if you are being sentimental. I have walked through South African homes where a worn recliner still holds the perfect angle for an afternoon nap, and I have seen expensive replacements that never quite fit the room.
The decision to reupholster recliner chair versus starting over comes down to honest questions:
- Does the chair still support your body the way it once did?
- Can the frame and mechanism handle another decade of use?
- Does the current shape still belong in your living space?
Sometimes the answer points to replacement. But often, to reupholster recliner chair is the better investment. It preserves the familiar frame and the comfort your body already knows. It costs less than a quality new unit, especially once you factor in South African import prices and delivery timelines.
Gathering Tools and Materials
Essential Upholstery Tools You Already Own
You might think a professional workshop is mandatory to reupholster recliner chair, but the essential tools are already hiding in your home. Before you begin, search your garage or cupboard first. A flathead screwdriver pries off old staples with little effort. Needle-nose pliers grip tacks that refuse to budge. A utility knife slices through worn fabric, and a magnetic tray keeps screws from vanishing into the carpet.
These items likely sit in your collection already. For the upholstery work itself, you will also need a staple remover and a heavy-duty stapler, both common in home toolkits. Review what you have before spending anything.
Choosing the Right Fabric for Recliners
Choosing the right fabric determines whether your efforts to reupholster recliner chair last a decade or a single season. Before purchasing, measure your existing upholstery to estimate yardage, then order extra for pattern matching. When you gather materials, include a foam pad and piping cord if the recliner has worn cushions.
Fabric for recliners must handle friction and repeated stretching. I always ask for the Martindale rub count; residential use demands at least 15,000 cycles. Also consider the frame’s location. Direct sunlight fades cheaper dyes, and pet claws snag loose weaves. This is where many people go wrong!
Common fabric choices:
- Leather: durable but requires conditioning.
- Microfibre: soft and stain resistant.
- Cotton blend: breathable but less abrasion resistant.
Test a swatch by bending it between your fingers. It should spring back without creasing. Your recliner’s mechanism moves, so the fabric needs flexibility without sagging.
Selecting Foam, Batting, and Webbing
A recliner’s mechanism endures countless cycles of motion, and the materials you select will determine its longevity. Begin by measuring the existing cushions to calculate foam requirements, but remember that the new foam will be thicker than its compressed predecessor if you stick with the original dimensions. Match the density to the usage: high-resilience foam for daily seating, medium-density for spare rooms. Webbing on the seat base needs equal attention, as worn elastic leads to a sagging platform. While you gather supplies, keep these essentials on hand to streamline the entire process:
1. A staple gun with 8mm staples to secure the webbing and fabric edges.
2. Webbing stretcher pliers to pull the straps taut before fixing them in place.
3. Sharp shears for cutting foam sheets cleanly without tearing.
4. A spray adhesive to bond the new foam to the plywood base.
For the webbing itself, you have two primary options: rubberized elastic for a softer ride, or woven jute for a firmer, more traditional support. The choice hinges on the user’s preference for how the chair should feel during recline. Select a foam with a firm ILD rating to counteract the pressure placed on the lower back when the footrest extends. These considerations dictate whether your reupholster recliner chair project delivers a comfortable, supportive result or a disappointing, short-lived fix.
Optional Supplies That Make the Job Easier
Some of the most tedious moments in any upholstery project are not the cutting or the stapling, but the repetitive reaching for tools that are just out of arm’s reach. While a basic kit will get the job done, a few optional supplies can halve the frustration factor when you reupholster recliner chair frames. Anticipation is key here, think about the sequence of your work before you begin.
Consider adding these to your workstation:
– A dedicated seam ripper for extracting the old, stubborn piping without damaging the new foam beneath.
– A magnetic tray to catch screws and springs that vanish into the chair’s crevices.
– A chalk marker for transferring pattern lines onto fabric, as it wipes away cleaner than wax.
Quiet work is a bonus. A small, handheld vacuum keeps the webbing free of debris and prevents dust from clogging the mechanism, which is often overlooked. This preparation turns a messy chore into a precise operation, especially when you have pets or children nearby, where noise and scattered staples are a hazard.
Step-by-Step Upholstery Process
Removing the Old Fabric and Foam Carefully
The real work begins with removal, and it demands more patience than muscle. Before you can reupholster recliner chair projects, you need to strip the piece down to its bare frame. Start by locating the staples or tacks holding the fabric to the underside of the seat. A staple remover and a pair of pliers will be your primary tools here. Work slowly along the edges, lifting the material away from the foam padding beneath. This step reveals how the manufacturer layered the materials, and that knowledge guides your reassembly later.
Once the main panels are off, you will find the foam sections secured with adhesive or more staples. Peel the fabric off carefully to avoid tearing it, because you will need it as a pattern for cutting the new upholstery. The old foam often crumbles or compresses into dust, so wear a mask while you pull it from the crevices. Inspect the padding as you go. If the foam is still firm in some areas, you can reuse it. If it disintegrates on contact, discard it entirely.
– Remove the back panel first, then the seat cushion covers.
– Use a flathead screwdriver to pry out stubborn staples.
– Label each fabric piece with chalk as you detach it.
A systematic approach saves you from confusion later. Keep the screws and clips sorted in a small container, and photograph the frame before you pull everything off. This visual reference is invaluable when you start the rebuild. The goal here is to expose the structure without damaging it, so you can reupholster recliner chair sections with confidence. Take your time with the foam removal, since scratches on the wood or metal frame will affect the final fit. Once the shell is bare, you are ready to move on to the next phase of the project.
Measuring, Cutting, and Marking New Pieces
There is a quiet satisfaction in transforming a worn frame into something that feels intentional again. When you reupholster recliner chair sections, the old fabric becomes your most reliable template. Lay it flat on your new material, aligning the grain of the cloth as you go. The direction of the weave matters, as it affects how the fabric stretches over the curves of the frame.
Use tailor’s chalk to trace each piece with a generous allowance. A quarter inch of extra fabric gives you room for error, while a half inch provides a buffer for the thick folds that tuck into the mechanism housing.
1. Pin the old pattern pieces to the new fabric to prevent shifting.
2. Mark all staple lines, not just the outer edges.
3. Cut with sharp shears, never a utility knife on a soft surface.
Remember to match the pattern repeat if your chosen fabric has one. A misaligned stripe or floral motif will pull the eye immediately, undermining the entire project. Transfer every notch and reference mark from the old material to the new one. These small notations will guide your staple placement and ensure the foam and batting sit correctly beneath the surface. Measure twice, cut once, and trust the process. The precision of this stage determines whether the final silhouette looks factory fresh or slightly off.
Replacing Foam, Padding, and Springs
Once the old fabric is peeled away, the true state of the chair’s internals is revealed. Springs that have lost their tension groan under the lightest pressure, and foam that was once plush now crumbles into a dusty residue. This is the stage where the chair’s comfort is either restored or permanently compromised. When you reupholster recliner chair covers, you must also address the support systems beneath them. The webbing that holds the springs in place often stretches beyond recovery, especially on chairs that have seen daily use for several years.
The process of rebuilding the seat foundation requires a steady hand and patience. I start by securing new zigzag springs to the frame railings, using heavy duty clips that will not slip over time. For the foam, precise cuts are essential. A utility knife with a fresh blade makes a world of difference, slicing through high density foam without tearing it. I also add a fresh layer of polyester batting over the foam to mask any hard edges and create a smooth transition to the armrests.
Here is the sequence I follow for every chair.
1. Replace broken or tired springs with new ones that match the original gauge.
2. Secure the springs to the frame using a hog ring plier.
3. Place a sheet of burlap or jute over the spring assembly to prevent the foam from poking through.
4. Cut and fit the custom foam pieces, checking for any gaps along the sides and front edge.
5. Wrap the foam with a layer of batting to soften the contours.
The springs act as the first line of defense against the daily compression of sitting down. If they are weak, the foam will fail prematurely, even if it is brand new. The relationship between these elements is direct and mechanical. There is no magic involved, just proper tension and layering. I always test the finished foundation before installing the fabric cover. I press down firmly in the center of the seat and along the corners, feeling for any plunging sensations that indicate a need for more firm support. When the cushion rebounds evenly and quickly, the structure is ready. This attention to the inner structure is what separates a long lasting restoration from a superficial fix. Each part has its role, and the mechanics handle the weight while the padding provides the tactile comfort. When you reupholster recliner chair mechanisms, you are not changing the function, but you are ensuring the body meets a solid, forgiving base each time. The stitching will hold the leather or fabric together, but the springs and foam will carry the load each day.
Attaching the New Fabric to Each Section
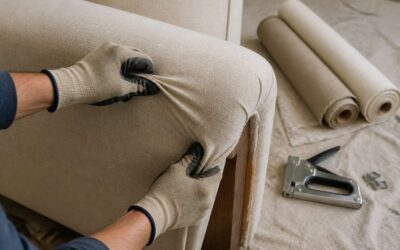
Statistically, the average person sits on their recliner for over 700 hours a year, yet the fabric is often the last thing we think about until it splits. Fitting the new material onto the frame is where the patience of a saint meets the stubbornness of a folding bed. You will wrestle with wrinkles, negotiate with curves, and eventually accept that the armrest is a cardinal point of the compass you must respect. I always start with the inside back panel, pulling the fabric taut and stapling it along the top edge. This establishes a baseline so the rest of the material hangs correctly.
After the back panel is set, I move to the wings and arms. The trick is to work in a consistent direction:
1. Align the fabric grain with the vertical line of the arm.
2. Use a thin, flat tool to tuck the edges into the frame creases.
3. Pull the fabric over the front of the arm and secure it underneath.
4. Trim only the excess you are certain of, leaving a small allowance.
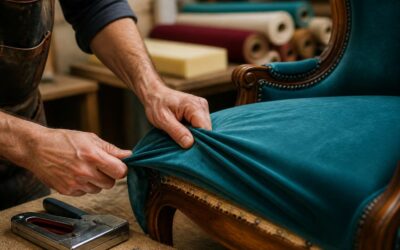
The seat and skirt follow last. It is a precise sequence for every DIY enthusiast trying to reupholster recliner chair covers without straying into the territory of a sloppy wrap. New fabric resists stretching the same way old fabric does, so each panel must be coaxed into its home position with a staple gun and a firm grip. The result is a fresh surface that matches the mechanical rebuild underneath. When you pull the cover over the foam and springs, the entire process finally looks like a chair again instead of a pile of parts. Just remember, the fabric is the part everyone sees, but the mistakes you hide underneath are your own secret.
Handling Curves, Arms, and Recliner Mechanisms
Curves and recliner mechanisms are where most DIY attempts collapse. The metal tracks and springs hide beneath the padding, but they dictate how the fabric must move. When you reupholster recliner chair arms, you need to accommodate the hinge point. Pull the material over the curve without blocking the lever. Stapling too close to the mechanism will jam the moving parts.
One method that works consistently:
- Mark the hinge location on the back of the fabric.
- Cut a small slit for the mechanism to pass through.
- Reinforce the slit with bias tape before stapling.
This prevents tearing when the footrest extends. For the arm curves, use heat to relax the fabric. A damp cloth and a steam iron can shape the material around a tight radius. Let it cool before securing. The mechanism should move freely after each panel is attached. Test the full range of motion before trimming excess.
Reassembling and Testing the Recliner
Over 40% of DIY upholstery projects unravel during the final assembly phase. This is the stage where patience becomes your most valuable tool. After the fabric is secured and the curves are shaped, gather every screw, bolt, and plastic cap in a single tray. Reassembling a recliner is a precise sequence, and missing a single component often means disassembling your hard work again.
Start with the backrest and work forward. Align the hinge points carefully and hand tighten each bolt before reaching for a power drill. The mechanism deserves gentle pressure. If a screw resists, stop. Forcing a fastener into a misaligned frame can strip the threads and compromise the entire structure you just spent hours perfecting.
Once every panel is secured, it is time for the test. Move the lever slowly and watch the footrest extend. Listen for grinding or catching. Run your hand along the seams to check for puckering. The fabric should glide smoothly without binding.
– Extend the footrest fully and hold for five seconds.
– Tilt the chair back and return it to the upright position.
– Repeat three times to settle the material into its final position.
A successful reupholster recliner chair job ends with a chair that moves as freely as it did before you started. Trim any stray threads and vacuum the seams. The transformation is complete, and the silent, smooth operation of the mechanism confirms the job was done correctly.
Common Challenges and Smart Solutions
Dealing with Stubborn Hog Rings and Staples
There is a moment in every DIY project when the initial enthusiasm meets the gritty reality of the work. With a recliner, that moment often arrives with a pair of worn pliers in your hand, staring at the stubborn little pieces of metal that hold the old fabric in place. It is tempting to see these fasteners as the enemy, but they are simply the final gatekeepers between you and a transformed piece of furniture. The process of removing them requires patience, and a healthy dose of respect for the original upholsterer’s craft.
When you decide to reupholster recliner chair models from the 1980s, you are often dealing with heavy-duty staples that have had decades to settle into the wood. A sharp flathead screwdriver is your best ally here. Slide it under the staple’s crown and give it a firm twist. For the rings, which are frequently found on the front edges and the back panels where the mechanism meets the fabric, the approach is different. do not pull at them. Instead, use your pliers to pinch the ring directly at the base loop, twisting in a single, decisive motion to break the seal.
A few common adjustments will make the entire job significantly less frustrating.
- Keep a magnetic bowl nearby to collect every staple and ring you remove. Losing one in the carpet is a minor annoyance, but stepping on one later is a painful memory you do not need.
- Work in sections. Removing all the fasteners at once can cause the batting to shift and the old fabric to tear into pieces that are hard to use as patterns.
- If a staple is buried too deep to catch with a screwdriver, a small, sturdy pair of end-cutting nippers can grab the edges that remain exposed.
The truth is that the frame is tougher than it looks. Do not worry about marring the wood with your pry marks, as it will be covered by new layers of material. However, you should be cautious with the thin plywood panels that form the sides of the footrest. Applying too much torque here can split the wood, creating a bigger repair job than the one you started. If you feel resistance that is excessive, stop and reposition your tool rather than forcing it.
Once the last ring gives way and the final staple is pulled, you will feel a sense of quiet accomplishment. The hard part is over, and the blank canvas of the frame is ready for the new fabric you have chosen. Success in this phase is not about being the fastest, but about being careful enough to preserve the structure for the years of comfort ahead.
Matching Patterns and Aligning Seams
Nearly three in every five DIY upholstery projects fail to impress because of a simple, avoidable mistake: the pattern does not line up where the seams meet. When you reupholster recliner chair surfaces, the fabric becomes a map of your patience, and the seams are its borders. A single shifted stripe or a wandering floral motif will betray every hour of careful work.
The secret lives in the cutting, not the sewing. Lay your fabric with the nap running in the same direction for every panel, and when you measure, do so from the same edge of the pattern repeat. This is the rhythm of the cloth, and it will guide your hands:
1. Identify the rapport, the spacing between identical points in the design, and mark it on your fabric with a soft pencil.
2. Align the centre of the back panel with the centre of the pattern, working outward from there.
3. Mirror the pattern on the armrests so the design wraps around the furniture like a continuous current.
A chevron or plaid demands alignment at the seams or the entire piece will look broken. Remember that the recliner mechanism pulls the fabric in different directions, so always match the pattern while the chair sits in its upright position to reupholster recliner chair sections flawlessly. The weave itself is honest, and the cloth will tell you if you are forcing it. When the seams finally meet and the motif runs unbroken from back to front, the chair becomes a single, breathing object rather than a patchwork of separate pieces.
Preventing Sagging in High-Use Areas
The truth that arrives after the third year of heavy use is that a recliner shows its character in the seat. A sagging base will ruin the finest fabric you can lay across it. When you reupholster recliner chair surfaces, you have the rare chance to fix this hidden weakness before it ever starts. The foam density you choose matters more than the weave of the cloth. A high-resilience foam with a firm ILD rating will hold its shape against the constant pressure of elbows and shifting weight.
The webbing beneath the cushion carries the true load. If it stretches, the foam follows. A layer of dacron batting over the foam adds a soft barrier that prevents the fabric from wearing through at the edges. For the seat panel that takes the daily poundings, consider a double layer of webbing crisscrossed for extra tension. The wooden base may need additional corner blocks if it flexes when you sit. The process of tightening and reinforcing requires patience, but the reward is a seat that remembers its shape long after the work is done.
– Staple the webbing taut, pulling each strip with full body weight before fixing it down.
– Use a foam pad with a density rating over 30 for the base cushion.
– Check the recliner mechanism’s bolts for looseness, as a wobbly frame will accelerate fabric wear.
Working Around Recliner Levers and Latches
Two centimetres from the lever is where precision moves. The lever assembly sits over the arm, and the constant pull of the recline test drags the webbing against the metal tab. To clear a full panel, I reupholster recliner chair sides with the handle removed first. The circlip releases, the spline slides free, and you get a flat surface for stapling. But the latch cable remains a rigid problem.
That cable runs from the release internals to the glide, always hovering exactly where you need to stretch. It creates a shadow line that breaks clean seams. You can unclip the plastic guides and tuck the whole wire behind the frame, but the cable will still wander. Working the material in three passes, not one, lets the fabric settle beneath.
Approach some framers use:
- Remove the lever and its washers, then give the shaft a twist to free it.
- Unscrew the cable retainer and flip the line over the hinge.
- Reattach the cable after the seat panel is anchored down.
Nobody feels the lever once the leather is on. to reupholster recliner chair with a cable under tension causes wear in the first year. That is the mechanical truth you avoid. The whole job feels far smaller when you let the mechanism sit out of the way.
Fixing Smaller Issues Before Reupholstering
The most common mistake people make when they decide to reupholster recliner chair frames is ignoring the small problems that existed before the fabric came off. You will regret skipping that squeak or that stiff lever once the new upholstery is on and the chair is back together. A beautiful finish does not compensate for a broken joint underneath.
Small mechanical issues are usually straightforward to solve. The most frequent problems I see are loose screws, worn out springs that have lost their tension, and debris caught in the glide tracks. A can of WD-40 and a good set of screwdrivers are likely to fix half of these issues in an afternoon. Before you cut a single piece of fabric, give the mechanism a full inspection.
– Check the recline glide tracks for accumulated dust and old grease buildup.
– Tighten every bolt on the footrest and backrest hinges.
– Test the spring coils for compression; pull them gently to see if they snap back.
– Look for cracked plywood staves on the backrest, these need wood glue and clamps now.
Structural damage to the wooden frame is the expensive problem. If you find a split in the plywood or a broken joint, fix it before you even think about measuring fabric. A generous amount of carpenter’s glue and a few corner brackets will handle most of this. Do not rely on nails alone. The constant rocking of the recliner motion puts stress on these joints every single day, and the fix will only hold if you use proper brackets.
The workers who reupholster recliner chair units for a living spend the extra time on this stage because they know what happens if they skip it. A chair that goes back together with a sagging footrest or a grinding lever will come back to them within a year with damaged fabric. The friction from a loose part will slowly wear down your new upholstery from the inside. Take the hour to do the minor fixes now, and save yourself the entire job again later.
Cost, Time, and Professional Alternatives
Estimating the Cost of a DIY Reupholstery
The real cost of a DIY project often reveals itself in the small purchases you did not anticipate. While a single roll of fabric seems affordable, the total for foam, adhesive, and new webbing can quietly surpass your initial budget. You might find yourself spending more to reupholster recliner chair than the piece is worth, especially if the mechanism requires specialist attention.
Time is another silent variable. A weekend project can easily stretch into two weeks when you factor in pattern alignment and the learning curve for tricky curves. For many, the process becomes a test of patience.
– If you have limited free time, the project drags for months.
– If you rush, you risk tears or misaligned seams.
Weighing these costs against a professional quote is a wise step. A skilled upholsterer carries the right tools and experience, potentially saving you from costly errors.
How Long Does the Project Really Take?
Reupholstering a recliner is a project that sounds deceptively simple. You picture a weekend of fabric, foam, and a staple gun, culminating in a chair that looks brand new. The reality, however, often unfolds over several more evenings. The true timeline depends heavily on your experience and the chair’s condition, but most homeowners should prepare for a commitment that spans a full week of evenings, not just a single Saturday.
For the DIY enthusiast, the process is a sequence of distinct phases. Each step carries its own learning curve, and rushing through any of them will show in the final result. Here is a realistic breakdown of where those hours go when you decide to reupholster recliner chair models yourself:
– Removal (4-6 hours): This is the detective work. You are carefully taking apart the existing upholstery, noting how each piece was cut and attached. Removing hundreds of staples and wrestling with stubborn clips takes time and patience.
– Pattern Creation and Cutting (2-3 hours): You cannot just drape fabric over the frame. Each section needs a pattern, often made from the old fabric or craft paper. Laying out, measuring, and cutting your new material requires precision to ensure patterns align.
– Assembly (6-8 hours): This is the staple-gun marathon. Reattaching each piece in the correct order, pulling the fabric taut without distorting the pattern, and navigating the complex mechanics of the footrest and backrest is the most technically demanding part.
– Finishing Touches (2 hours): Reinstalling plastic caps, trimming excess fabric, and reattaching any decorative trim or buttons that complete the look.
When you compare this to the professional route, the difference is stark. An experienced upholsterer can complete the entire job in a single day. They have the correct industrial staplers, the right foam-cutting tools, and the muscle memory to strip and rebuild a chair in a matter of hours. Their time is a direct reflection of accumulated skill.
Beyond the hours, consider the rhythm of the work. You will hit a point where the chair sits disassembled in your living room, unusable for days. That is a practical consequence of the DIY route. You are trading your available time and patience for the potential cost savings on labour.
Time is also a factor in sourcing. In South Africa, finding the perfect fabric can take a trip to specialist shops in your area, and ordering high-density foam online means waiting for delivery. These waiting periods add days to your schedule, effectively freezing the project in a state of suspended animation.
The decision to reupholster recliner chair pieces yourself versus hiring a professional often comes down to what your time is worth. If you enjoy the hands-on process and have a flexible schedule, the DIY route offers a deep sense of satisfaction. If your weekends are precious and you want the chair returned to service quickly, the professional’s speed is a significant value proposition that is often worth the extra upfront cost.
When to Hire a Professional Upholsterer
There is a quiet thrill in watching a professional upholsterer dismantle a recliner that has defeated you for a week. Their hands move with the confidence of a brain surgeon, and the chair is stripped to its skeleton in under an hour. For most South Africans, the decision to reupholster recliner chair mechanisms hinges on this observation.
The financial calculation rarely favours the amateur when the labour is costed honestly. Your time has value, and a project that drags across three weekends can erode the savings you anticipated. A professional offers a fixed quote, a guaranteed timeline, and the ability to restore a complex recliner architecture without leaving screws and springs scattered across your lounge floor.
Hiring a professional becomes the sensible option when your schedule resembles a packed taxi rank. The services they provide include:
– Precise foam cutting for lumbar support and armrests
– Industrial strength stapling that withstands daily reclining action
– Correct pattern alignment across the fabric seams
– Expert handling of the footrest and backrest mechanisms
Consider the cost of your patience, the value of your weekends, and the risk of a botched job that requires a second professional to repair. The phrase “reupholster recliner chair” should not become a recurring line in your household budget. Sometimes the wisest expenditure is the one that buys you a finished chair and your sanity.
Extending the Life of Your Recliner After Reupholstering
Let’s be honest, the quote for a professional to reupholster recliner chair units often triggers a sharp inhale. But that number usually includes the silent costs you cannot see. Upholstery fabric is priced per meter, and a recliner devours metres of it. The foam, the webbing, and the fresh springs all carry their own price tags. When you tally these against the hours a rookie will spend wrestling with the release mechanism, the professional quote starts to look less like a luxury and more like a forecast.
Time is the quiet villain in this saga. A weekend warrior might stretch the job across a month of Sundays. That is a month of living with a bare frame in the corner of your lounge. For many, the question is not whether they can find the money, but whether they can find the patience.
Once the chair is reborn, you guard it like a national treasure. You can extend that new lease on life by treating the fabric well.
– Rotate cushions weekly to spread wear.
– Keep the chair out of direct, harsh sunlight.
– Vacuum the seams to prevent grit from grinding into the fibres.
– Test the recliner mechanism regularly to keep the springs limber.
Protective sprays for the fabric are a wise investment, especially in a home where coffee flows freely. The right care means the next time you consider the costs related to reupholster recliner chair upkeep, you are years away from needing the service again.


0 Comments