Choosing the Right Cushion Fill
Polyurethane Foam Benefits and Drawbacks
Polyurethane foam is the quiet workhorse of most upholstery sponge products sold in South Africa. It is everywhere, from lounge suites to car seats, yet its character varies wildly. The secret lies in density, not just price. A high density block supports the body for years. A low density one will sag within months, leaving a permanent hollow that mimics a crater.
The trade-offs are real. Manufacturers choose polyurethane for its adaptability and cost effectiveness.
- It resists mould and mildew better than natural fills
- It offers a firm, even support that does not shift
- It is lightweight, making furniture easy to move
However, the drawbacks demand respect. It traps heat, and it can break down when exposed to sunlight. When a manufacturer rates an upholstery sponge, density matters more than name.
Memory Foam for Orthopedic Support
Some South African workers spend nine hours in a seat, and the material beneath them carries the whole load. I have moved most of my own furniture, and I know the difference between a foam that gives a long day and one that resigns to a hollow early on. Memory foam, as a specific type of upholstery sponge, works through a viscoelastic response. It softens with your body heat, yielding at the hips while it stays firm along the curve of the back.
This uneven behaviour is genuinely good for the spine. It adds three practical benefits:
- Relief from the ischial tuberosity.
- Lumbar support that does not shift.
- Reduction of twisting shear at L4 and L5.
When you look for an orthopaedic fill, check the layer thickness right away. A thin slab loses its advantage faster than any other foam. The right one is a dense memory foam cushion, not a general sponge.
Natural Latex for Eco-Friendly Comfort
Natural latex comes from the rubber tree, Hevea brasiliensis, and a single tree yields about 150 grams of latex per tapping. That fact stays with me every time I sit on a cushion made from it. Unlike the petroleum based options stacked in warehouses, this upholstery sponge breathes. It resists dust mites and mildew without chemical treatments, which matters in a coastal climate like Durban’s. When you choose an upholstery sponge for a chair that sees daily use, natural latex holds its shape for years.
The feel is different too. Latex pushes back with a lively firmness, not the slow sink of memory foam. The open cell structure keeps air moving, so you do not end up sweating through a hot afternoon.
– It is heavier than synthetic fills, so expect a solid lift when moving furniture.
– The price reflects the source, but the lifespan often balances that out.
I have reupholstered enough chairs to know that choosing natural latex is a long term decision, not a quick fix.
Comparing Feather and Down Blends
A single goose yields roughly 100 grams of down, which explains the cost of a feather and down cushion. This blend offers a plush seat, but it behaves differently from an upholstery sponge. Feathers provide structure, down delivers softness. In a coastal climate, this fill traps heat and demands daily fluffing.
- Down clusters compress easily, making cushions light to lift.
- Feather shafts can pierce thin covers, so a dense ticking fabric is necessary.
- A higher down ratio creates a softer sit, though it lacks the firm edge of sponge.
For those who accept the upkeep, feather and down rewards with a traditional luxury. An upholstery sponge requires no attention, yet it never matches that old-world give.
Understanding Density and Support
Low-Density in Decorative Throw Pillows
The softest throw pillow often hides the weakest structure. Yet its density dictates everything from how it slumps to how long it lasts. Low-density foam fills many decorative pillows, and it chooses softness over structure. This type of upholstery sponge invites you to sink, not sit, which works well for occasional lounging. The trade-offs are tangible:
- Immediate plush comfort
- Faster compression over time
- Reduced support for posture
For a purely ornamental piece, that trade-off is acceptable. For anything functional, you need higher density. Consider what you value: immediate softness or lasting shape!
Medium-Density for Everyday Seating
The phrase “hardwearing” appears on countless South African furniture tags, yet the actual foam beneath the fabric often tells a different story. Medium density upholstery sponge represents the pragmatic middle ground, a choice that avoids both the slumping theatrics of low density and the unyielding posture of high density. This is the foam for the daily chair, the dining room bench, and the couch that hosts everything from Monday night television to Sunday afternoon visits.
Medium density typically supports a sitting person without that sinking feeling, while still offering enough give to feel welcoming. It handles the routine abuse of sitting, standing, and shifting with a quiet resilience that lower grades simply cannot offer. For homes with teenagers who treat furniture as a landing pad, or for offices where chairs endure eight hour shifts, this specification holds its shape far longer.
– Better resistance to permanent indentation
– Balanced firmness that suits most body types
– Reasonable price point for the durability offered
– Works well for both reupholstery projects and new builds
The true test of this material comes with time. After a year of daily use, a medium density sponge will show far less evidence of its workload than its softer counterpart. It lacks the cloud like surrender of a low density fill, but it returns the investment through sustained appearance and support. For the furniture that must perform without complaint, this middle option is the sensible selection. It is the upholstery sponge that does not demand attention, yet quietly ensures the seat remains comfortable long after the novelty of purchase fades.
High-Density for Heavy-Duty Use
High density upholstery sponge serves the most demanding furniture applications. It is the material chosen for commercial seating, waiting room benches, and the occasional recliner that must survive generations of use. The firmness is immediate, almost rigid, yet this is precisely what protects the frame and the sitter from premature collapse.
Density and support are not interchangeable terms. Density measures mass per volume, while support describes how the foam resists compression. A high density foam with proper Indentation Load Deflection (ILD) rating provides both. This matters for heavy individuals and for pieces used continuously for hours.
- Lower risk of bottoming out
- Superior recovery after prolonged pressure
- Maintains structural integrity across temperature shifts
Selecting this grade of upholstery sponge means accepting a firmer initial feel. That firmness rarely softens dramatically, which is a benefit for those who prefer consistent posture support.
Measuring and Cutting for a Perfect Fit
Essential Preparation and Templates
Measuring an upholstery sponge accurately saves both time and material. I once watched a novice cutter ruin an entire sheet by trusting a crooked chalk line. Preparation matters. Start with a clean, flat surface. Use a long metal ruler, not a tape measure, for the initial mark. A fine-tip permanent marker draws a more precise line than chalk on dark foam.
Cutting demands its own care. An electric carving knife works well, but a sharp serrated blade offers more control. For curves, a compass cutter can trace the pattern. Always cut slightly oversized. Foam compresses, so a tight fit beats a loose one.
Here is the process I follow for consistent results:
– Measure the recess dimensions at the base, not the top.
– Mark the foam with the fabric pattern laid backwards.
– Cut on the waste side of the line to allow for trimming.
That discipline separates a professional outcome from a frustrating redo. When you source an upholstery sponge from a local supplier, verify your measurements against the actual piece, not the product listing.
Sharpening Tools for Clean Edges
A dull blade does not slice an upholstery sponge, it crushes it. The result is a ragged edge that betrays every seam. Each upholstery sponge presents its own character, so I sharpen my tools before every project. A fine honing steel keeps long blades true, while a small whetstone restores the curve on compass cutters. Sharp steel makes all the difference!
Measuring still decides the outcome. I mark the recess at the base, never the top, and I account for compression with a small allowance. A fine-tip marker on the foam’s underside produces a cleaner reference than chalk ever will.
- A coarse stone for reshaping tired edges
- A fine grit stone for the final edge
- A leather strop for a polished finish
The perfect fit begins before the first cut. A clean edge on the foam translates directly to a clean line on the finished furniture. That is the quiet craft of a professional.
Using an Electric Knife for Thick Slices
Measure from the base of the recess, never the top. The top edge shifts as foam settles under its own weight. I use a fine-tip marker on the underside, adding a two percent compression allowance for every ten centimeters of thickness. That margin turns a tight fit into a perfect one when the cover pulls closed.
For thick slices, an electric knife outperforms any hand tool. The reciprocating blades track straight through a 15 centimeter upholstery sponge block without dragging the surface. I mark the cutting line with masking tape to guide the blade. Then I slice in one slow pass, letting the knife’s momentum do the work. The blade angle stays at zero for a vertical cut. I brush away debris after every five centimeters.
The finished slice remains straight from edge to edge.
Hand-Cutting Techniques for Curved Corners
Measuring an upholstery sponge for a perfect fit requires reading the true dimensions, not the visual ones. I always measure the recess at its deepest point. The lip shifts under weight, and that discrepancy ruins the fit!
Curved corners demand a hand technique. A thin bladed knife works best for these sections. I rock the blade in short arcs while rotating the sponge, never the tool. This motion keeps the cut vertical, and hand cutting suits these corners where the electric knife cannot follow.
The quality of the curve depends on patience:
- A chalk line fades fast; trace it again if you hesitate.
- The blade angle, once lost, cannot be recovered mid cut.
- Small passes leave a cleaner edge than one aggressive swipe.
The result appears when the cover pulls tight without puckering. A well cut curve disappears entirely, which is the highest praise an upholstery sponge can receive.
Installing Padding under Tight Covers
Wrapping with Bonded Polyester Batting
One statistic worth noting: a staggering 80% of DIY upholstery failures stem from improper padding installation, not fabric choice. This reality becomes painfully obvious when you stretch a pristine cover over a lumpy, uneven base. The process of fitting tight covers demands patience and a strategic approach to the layers beneath. When your chosen upholstery sponge has been sculpted to size, the battle shifts to achieving that smooth, professional finish that distinguishes quality work from amateur efforts.
Tight covers impose a unique set of challenges. They compress the underlying material, forcing every ridge and valley to the surface. A rough cut edge will telegraph through the fabric, creating an unsightly line. To counter this, you must consider the interface between the foam and the textile. The solution often lies not in the primary cushioning layer, but in the intermediary materials designed to create a seamless transition. These materials bridge the gap, absorbing the minor imperfections of your handiwork.
This is where bonded polyester batting enters the equation. This versatile layer acts as a forgiving buffer, cradling the contours of your base foam. It fills small gaps and softens sharp corners, providing a smooth canvas for your final fabric. The application requires a deft touch, as the batting must be wrapped snugly without being stretched so taut that it compresses the foam’s resilience. A balanced tension ensures the batting performs its duty without sacrificing the comfort of the core.
Working with batting under a tight cover involves a few practical considerations that can make or break the final result. To achieve a flawless surface, pay attention to the following steps:
– Overlap the batting seams by at least an inch to prevent visible lines on the finished piece.
– Use a spray adhesive to temporarily hold the batting in place, allowing for adjustments before final fitting.
– Trim the batting cleanly, leaving a slight allowance at the edges to wrap around the foam corners.
The interplay between the batting and the tight fabric creates a unified structure. The batting should move with the upholstery sponge, not against it. If the layers shift independently, you will experience bunching or sliding, which ruins both the look and the longevity of the cushion. A secure, integrated wrap ensures that every push and pull on the fabric affects the whole assembly in concert, maintaining integrity under daily use.
Stapling Basics for Firm Anchoring
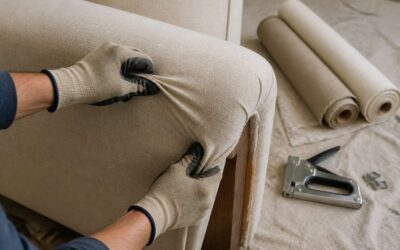
Stapling the assembly to the frame determines the quality of the finished piece. A loose anchor invites the cushion to migrate, and the resulting wrinkles resist correction. The upholstery sponge beneath the batting must be held firmly at the perimeter, since any slack here multiplies across the finished surface.
Begin by positioning the fabric and padding together, then drive the first staples at the centre of each edge. I find it helps to work outward toward the corners, maintaining constant tension with one hand while the other operates the stapler. This sequence prevents the trapped air and shifted foam that ruin so many rushed installations!
Some practical reminders for secure anchoring:
- Keep staple spacing tight around curves and generous on straight runs.
- Check that each fastener sinks fully into the hardwood frame.
- Confirm the padding layers remain aligned before closing each side.
Smoothing Wrinkles and Keeping Tension
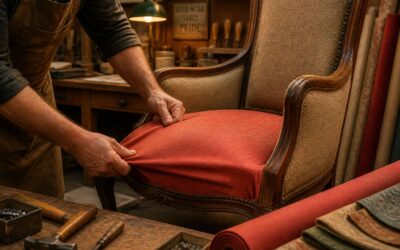
A close-fitting cover exposes every hesitation beneath. When the upholstery sponge shifts during installation, the fabric telegraphs that movement as a crease. I press one hand flat against the foam while the other eases the cover into position.
Wrinkles appear where the cover outpaces the foam. Work from the centre line outward, smoothing with the palm rather than the fingertips. The palm distributes pressure evenly, preventing a diagonal pull.
- Check that the upholstery sponge sits flush against the frame before tensioning.
- Reach beneath the cover to confirm no fold has formed in the padding.
- Adjust adjacent edges in sequence to keep the surface balanced.
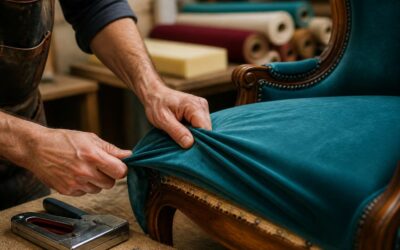
Keeping tension steady is a matter of rhythm. Each staple should land only after the fabric has been pulled taut across the entire edge. If the cover puckers, release the pressure, lift the fabric clear of the foam, and begin again. A patient hand rewards the work.
Trimmer Folds to Avoid a Bumpy Edges
Installing padding under tight covers is where a trimmer fold can save the entire job. The upholstery sponge wants to bulge where the cover compresses it. A neat fold, not a scrunch, keeps the edge flat.
I fold the excess fabric along the seam line, then tuck it against the foam with one smooth motion. The key is controlling the fold depth. Too shallow and the edge rides up; too deep and the cover pulls crooked.
Most trimmer problems trace back to rushing the fold sequence. Take the edges one at a time, smoothing each fold before moving on. The bumpy edge you feared becomes a crisp, clean line.
Restoring and Upgrading Worn Seating Areas
Removing Deteriorated Layers Safely
An old chair holds more than just its frame. It carries the shape of every person who ever sat down to rest, to talk, to think. When the foam finally gives out, that history is still there, but the comfort is gone. That is the moment to bring it back to life.
Before adding anything new, you need to strip the seat down to its bones. Flip the piece over and inspect the webbing or springs. If the support structure is broken, replace it first. Then, carefully pull away any dust covers and muslin layers to expose the original foam.
The critical step is identifying the adhesive used in the original build. Older furniture often uses solvent based contact cement. Inhaling those fumes during removal can cause serious harm. So, work in a well ventilated area and wear appropriate protection:
1. Use a putty knife to pry the foam loose from the frame.
2. Cut the foam into manageable sections with a sharp utility knife.
3. Lift each piece out slowly to avoid damaging the underlying springs.
For a deep seat cushion, you will often find a slab of deteriorated foam resting on a firm base. Sometimes the base is still sound. If it is, you can simply level the surface and apply a fresh layer of upholstery sponge directly on top of it. If the base is cracked or crumbling, remove every last particle to ensure the new materials sit on a solid, flat platform.
Adding Fresh Padding over Jute Webbing
Jute webbing often outlasts the foam placed above it. It dulls, stretches, and sags long before the frame gives up. When the old upholstery sponge is gone, the webbing deserves your attention first. Fresh webbing in a tight pattern gives the replacement cushion a dependable base. The correct tension matters more than the weave pattern. A bowed slat underneath will defeat even the best foam.
Here is what I have learned after years of redoing seats. The density of the upholstery sponge should match the support below it. A soft sponge over taut jute webbing produces a comfortable bounce. A firm sponge over sagging webbing feels hard and unyielding. So re-tension or replace the webbing before layering in the new foam. The seat should feel solid under your palm before you go any further.
Finishing the Final Dacron or Cotton Layer
After the webbing holds firm, the eye moves to the surface. A fresh upholstery sponge deserves a smooth final skin. Dacron or cotton wadding acts as that skin. It hides the sharp transitions between foam and frame. It softens the edges your hands will feel every time someone sits.
Cotton breathes and settles. Dacron keeps its loft longer in humid coastal South African homes. I prefer a single wrap over the foam, not a double fold, because bulk creates ridges. Pull the wadding taut and staple it along the frame line. Let the excess hang, then trim it with a fresh blade.
- The layer should be thin enough to press with a finger
- Thick enough to mask the foam outline
This finishing layer changes how the seat reads visually. It rounds the silhouette and gives the fabric a plush landing over the upholstery sponge beneath.

0 Comments